

Add a client
A client is an employer whose payroll your bureau runs. The Add employer wizard asks for everything in five short steps. Only the bureau owner and administrators can add clients.
Before you start
Have these to hand:
- the company's legal name and its employer registration number (the PAYE number from Revenue, 7 digits and 1 or 2 letters, for example
1234567T) - the address
- who you deal with at the client, and who approves payroll there (if anyone)
The registration number cannot be changed later. If it is wrong, you add the employer again.
Step 1: Company
Choose Bureau at the bottom of the menu, then All employers, then Add employer. (Or open the employer switcher and choose + Add employer.)
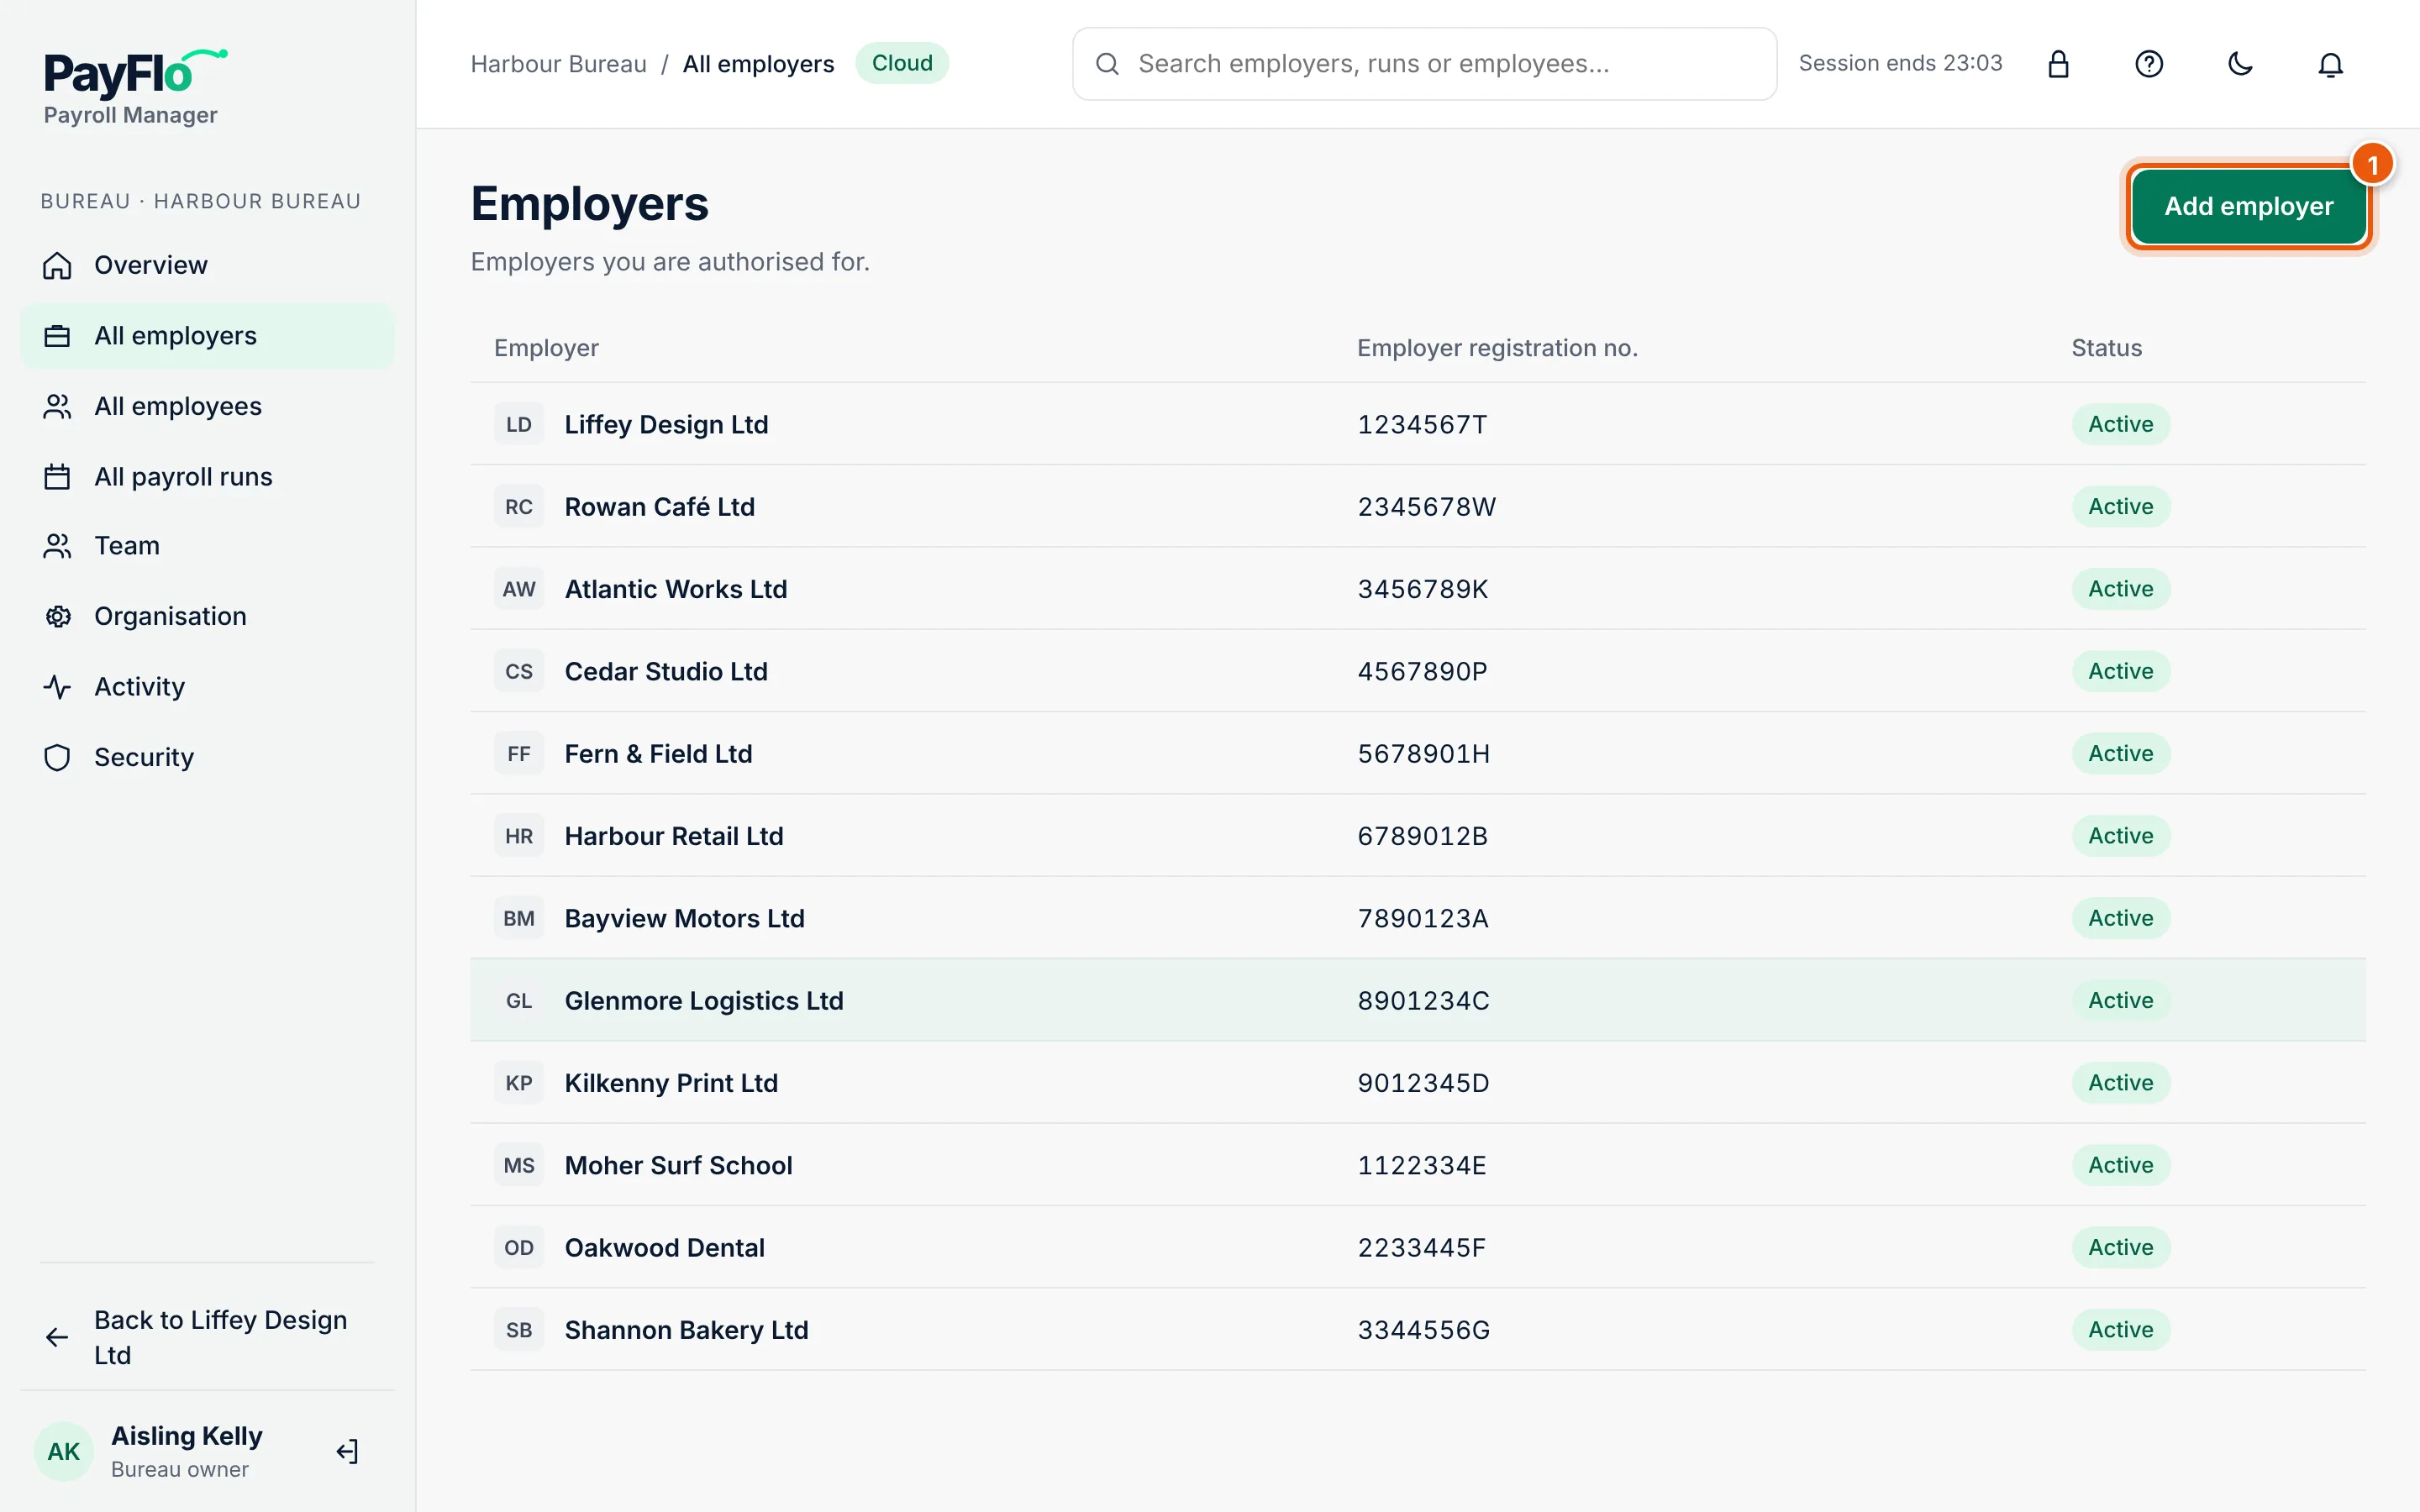
Enter the Legal name and the Employer registration no.
If you know them, add the Trading name, the CRO company number and the VAT number. These are optional.
Choose Continue.
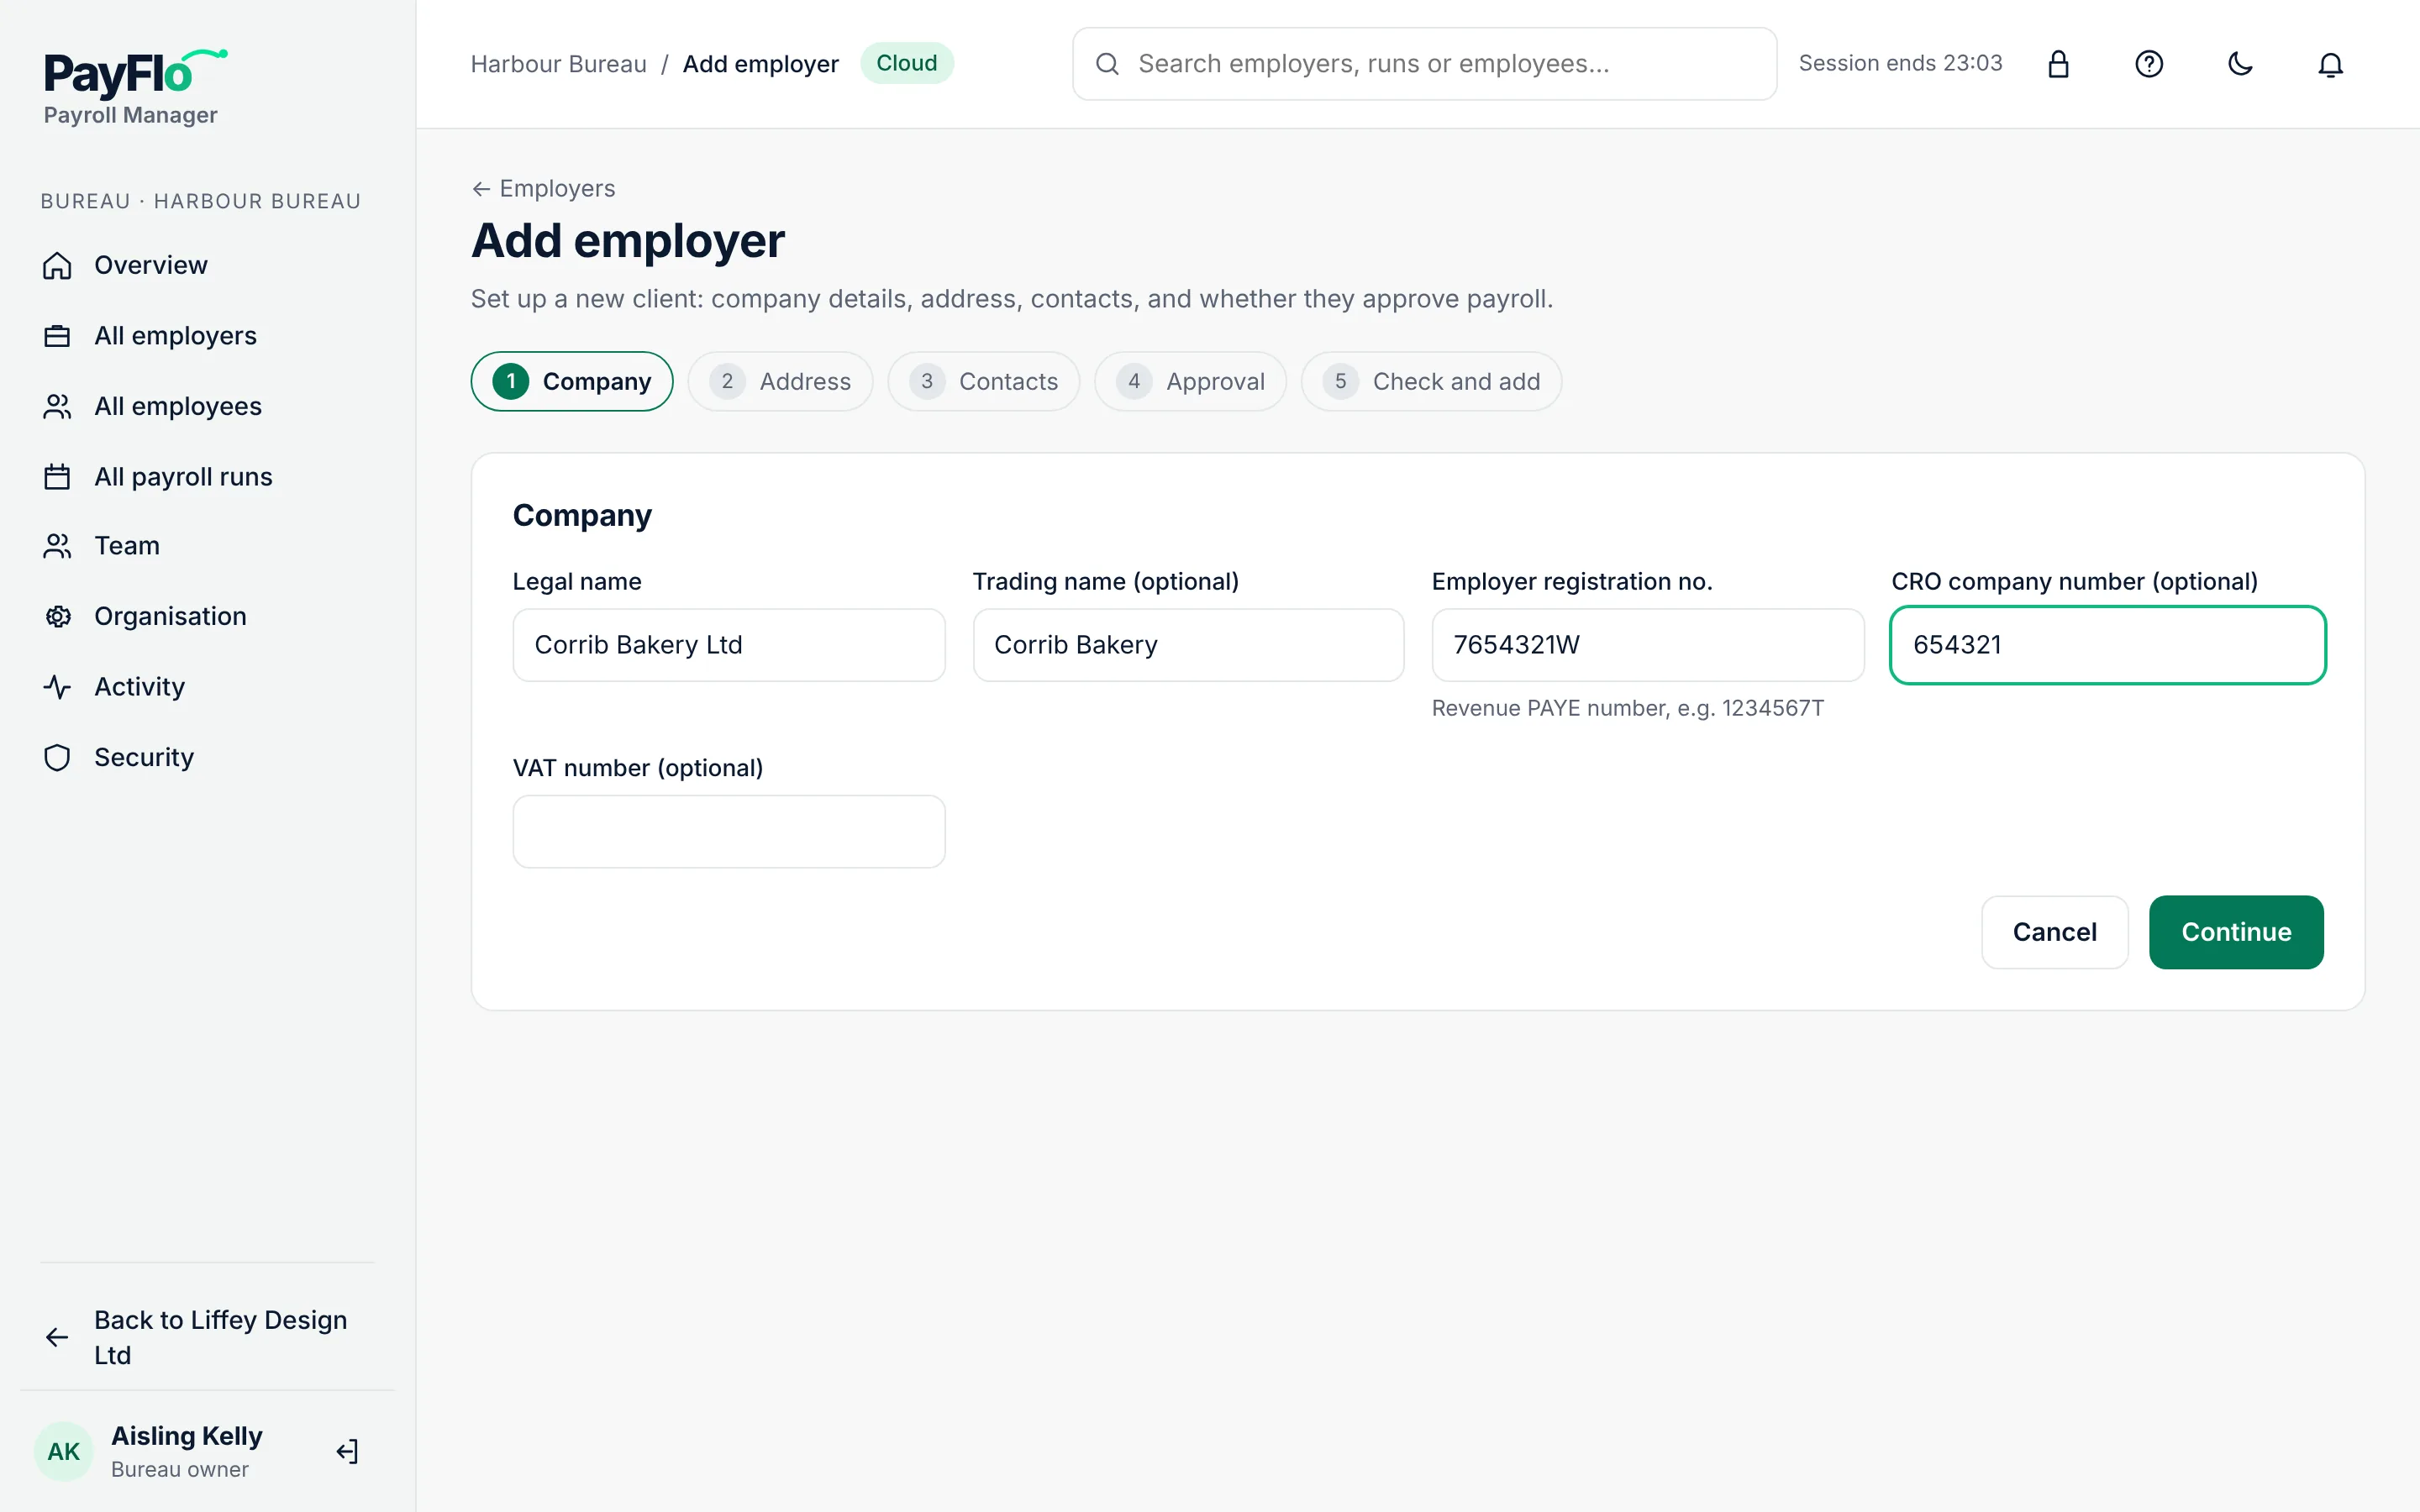
Step 2: Address
- Enter Address line 1 and Town or city. The second address line, the county and the Eircode are optional.
- Choose Continue.
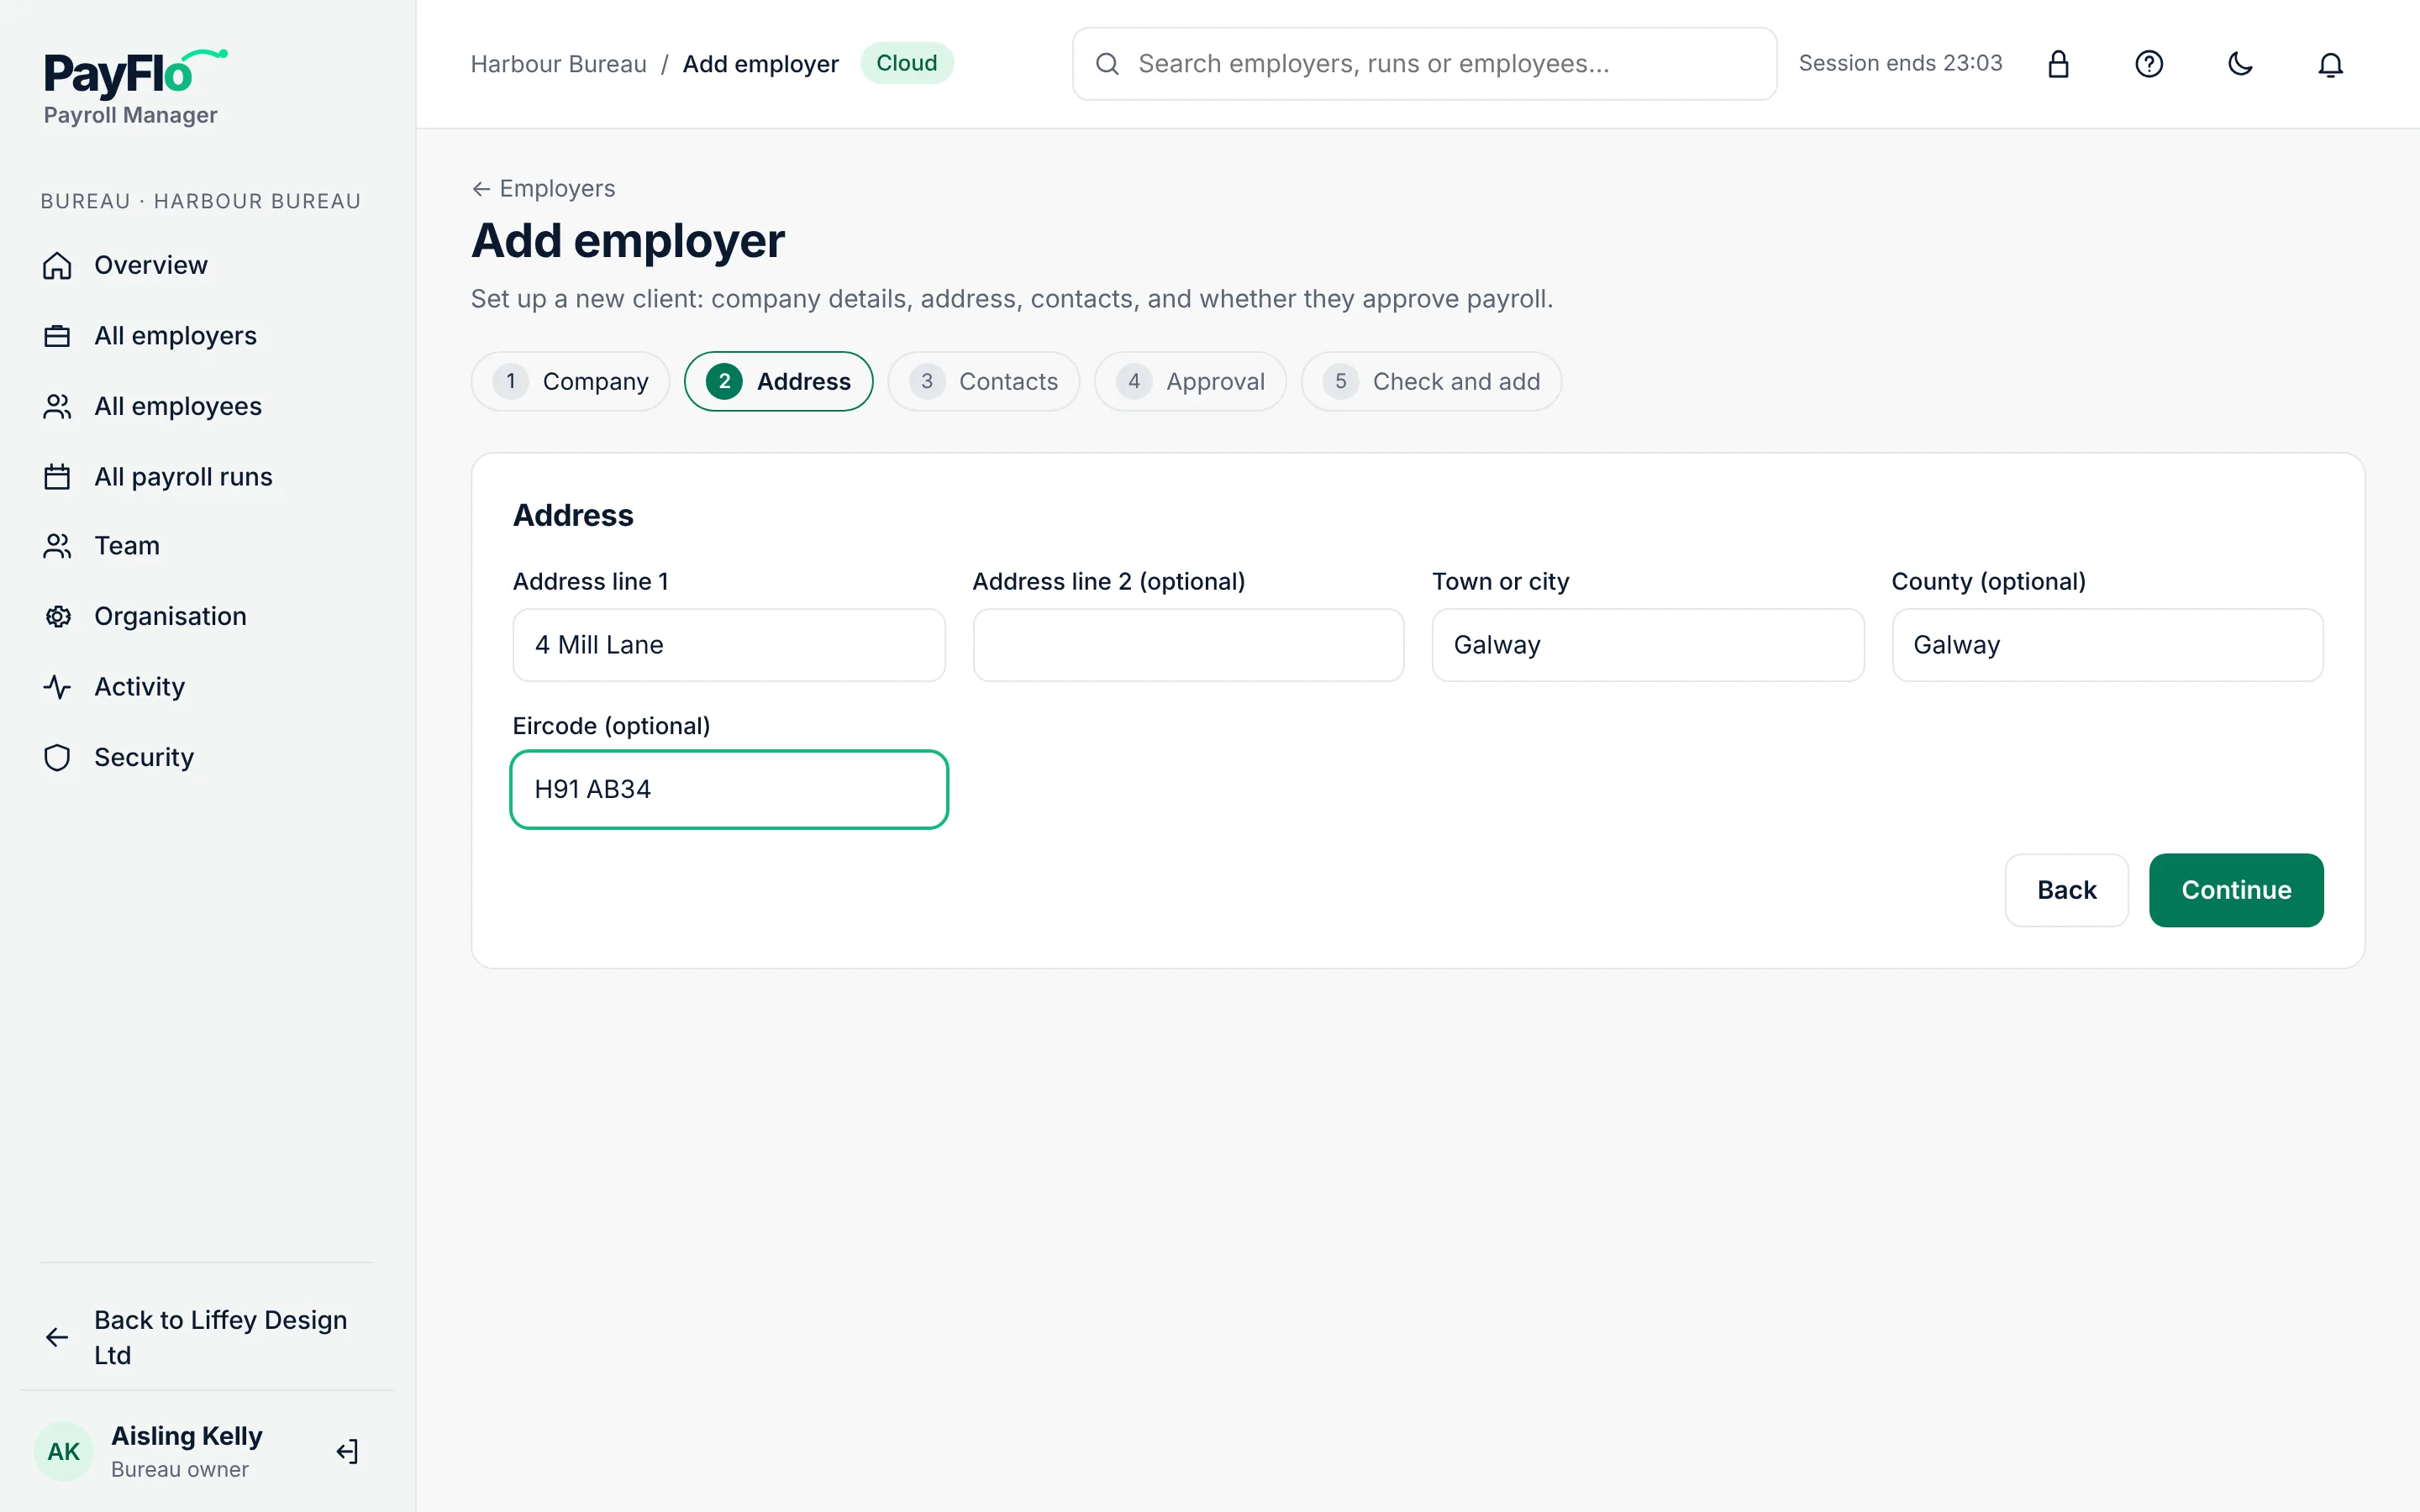
Step 3: Contacts
Contacts are the people at the client you deal with. They are for your reference and do not get an account.
- Enter the person's Name and choose a Role: Contact, or Administrator for the person who handles payroll matters at the client.
- Add a job title, email and phone if you have them.
- To add another person, choose Add contact. To remove one, choose Remove contact.
- Choose Continue.
Step 4: Approval and AI
This step has two questions. Neither has a default answer for approval, so you have to choose.
Does this client approve each pay run before it is finalised? (1)
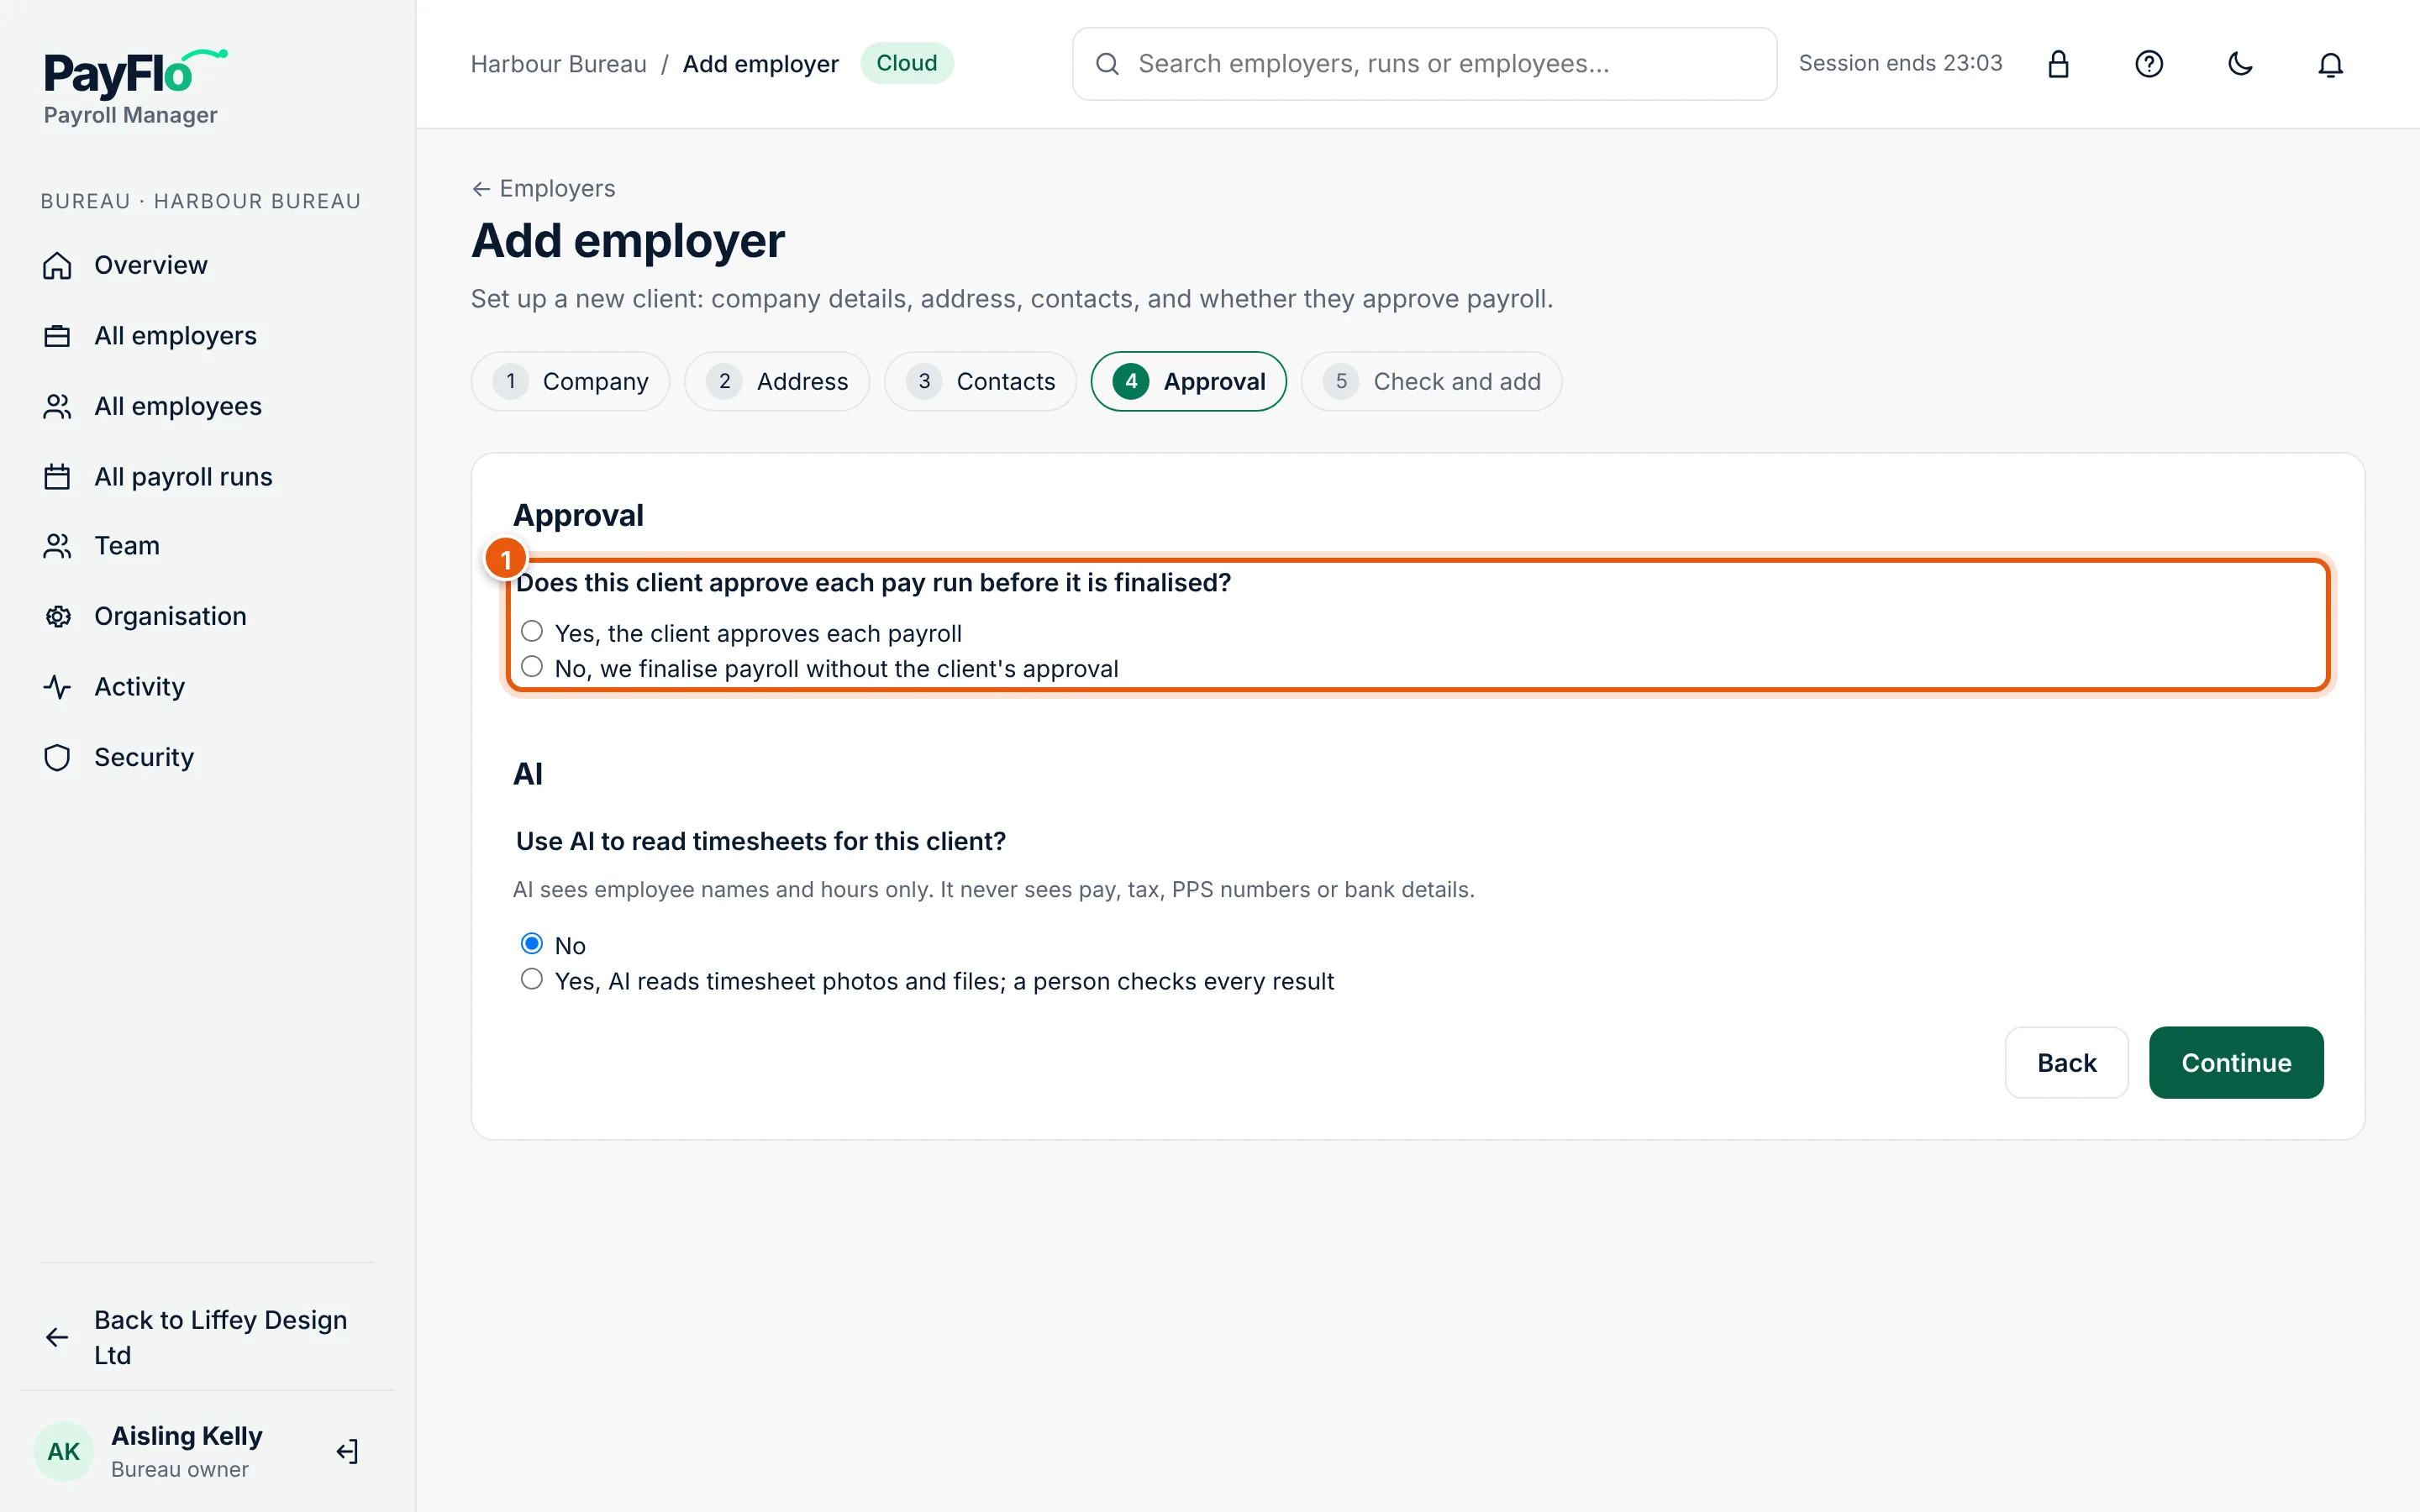
- No, we finalise payroll without the client's approval: your bureau checks and approves the payroll itself.
- Yes, the client approves each payroll: then say who can approve.
If you choose Yes:
- Under Who can approve, add each person who may approve. Contacts with an email appear as buttons (for example Add Mary Byrne); choose one to add that person. Add another person adds someone who is not a contact.
- When there is more than one approver, choose how many approvals are needed under Approvals needed (1 below): Any one of 2, 2 of 2 (all), and so on. Approval requests go to all approvers at the same time; there is no order.
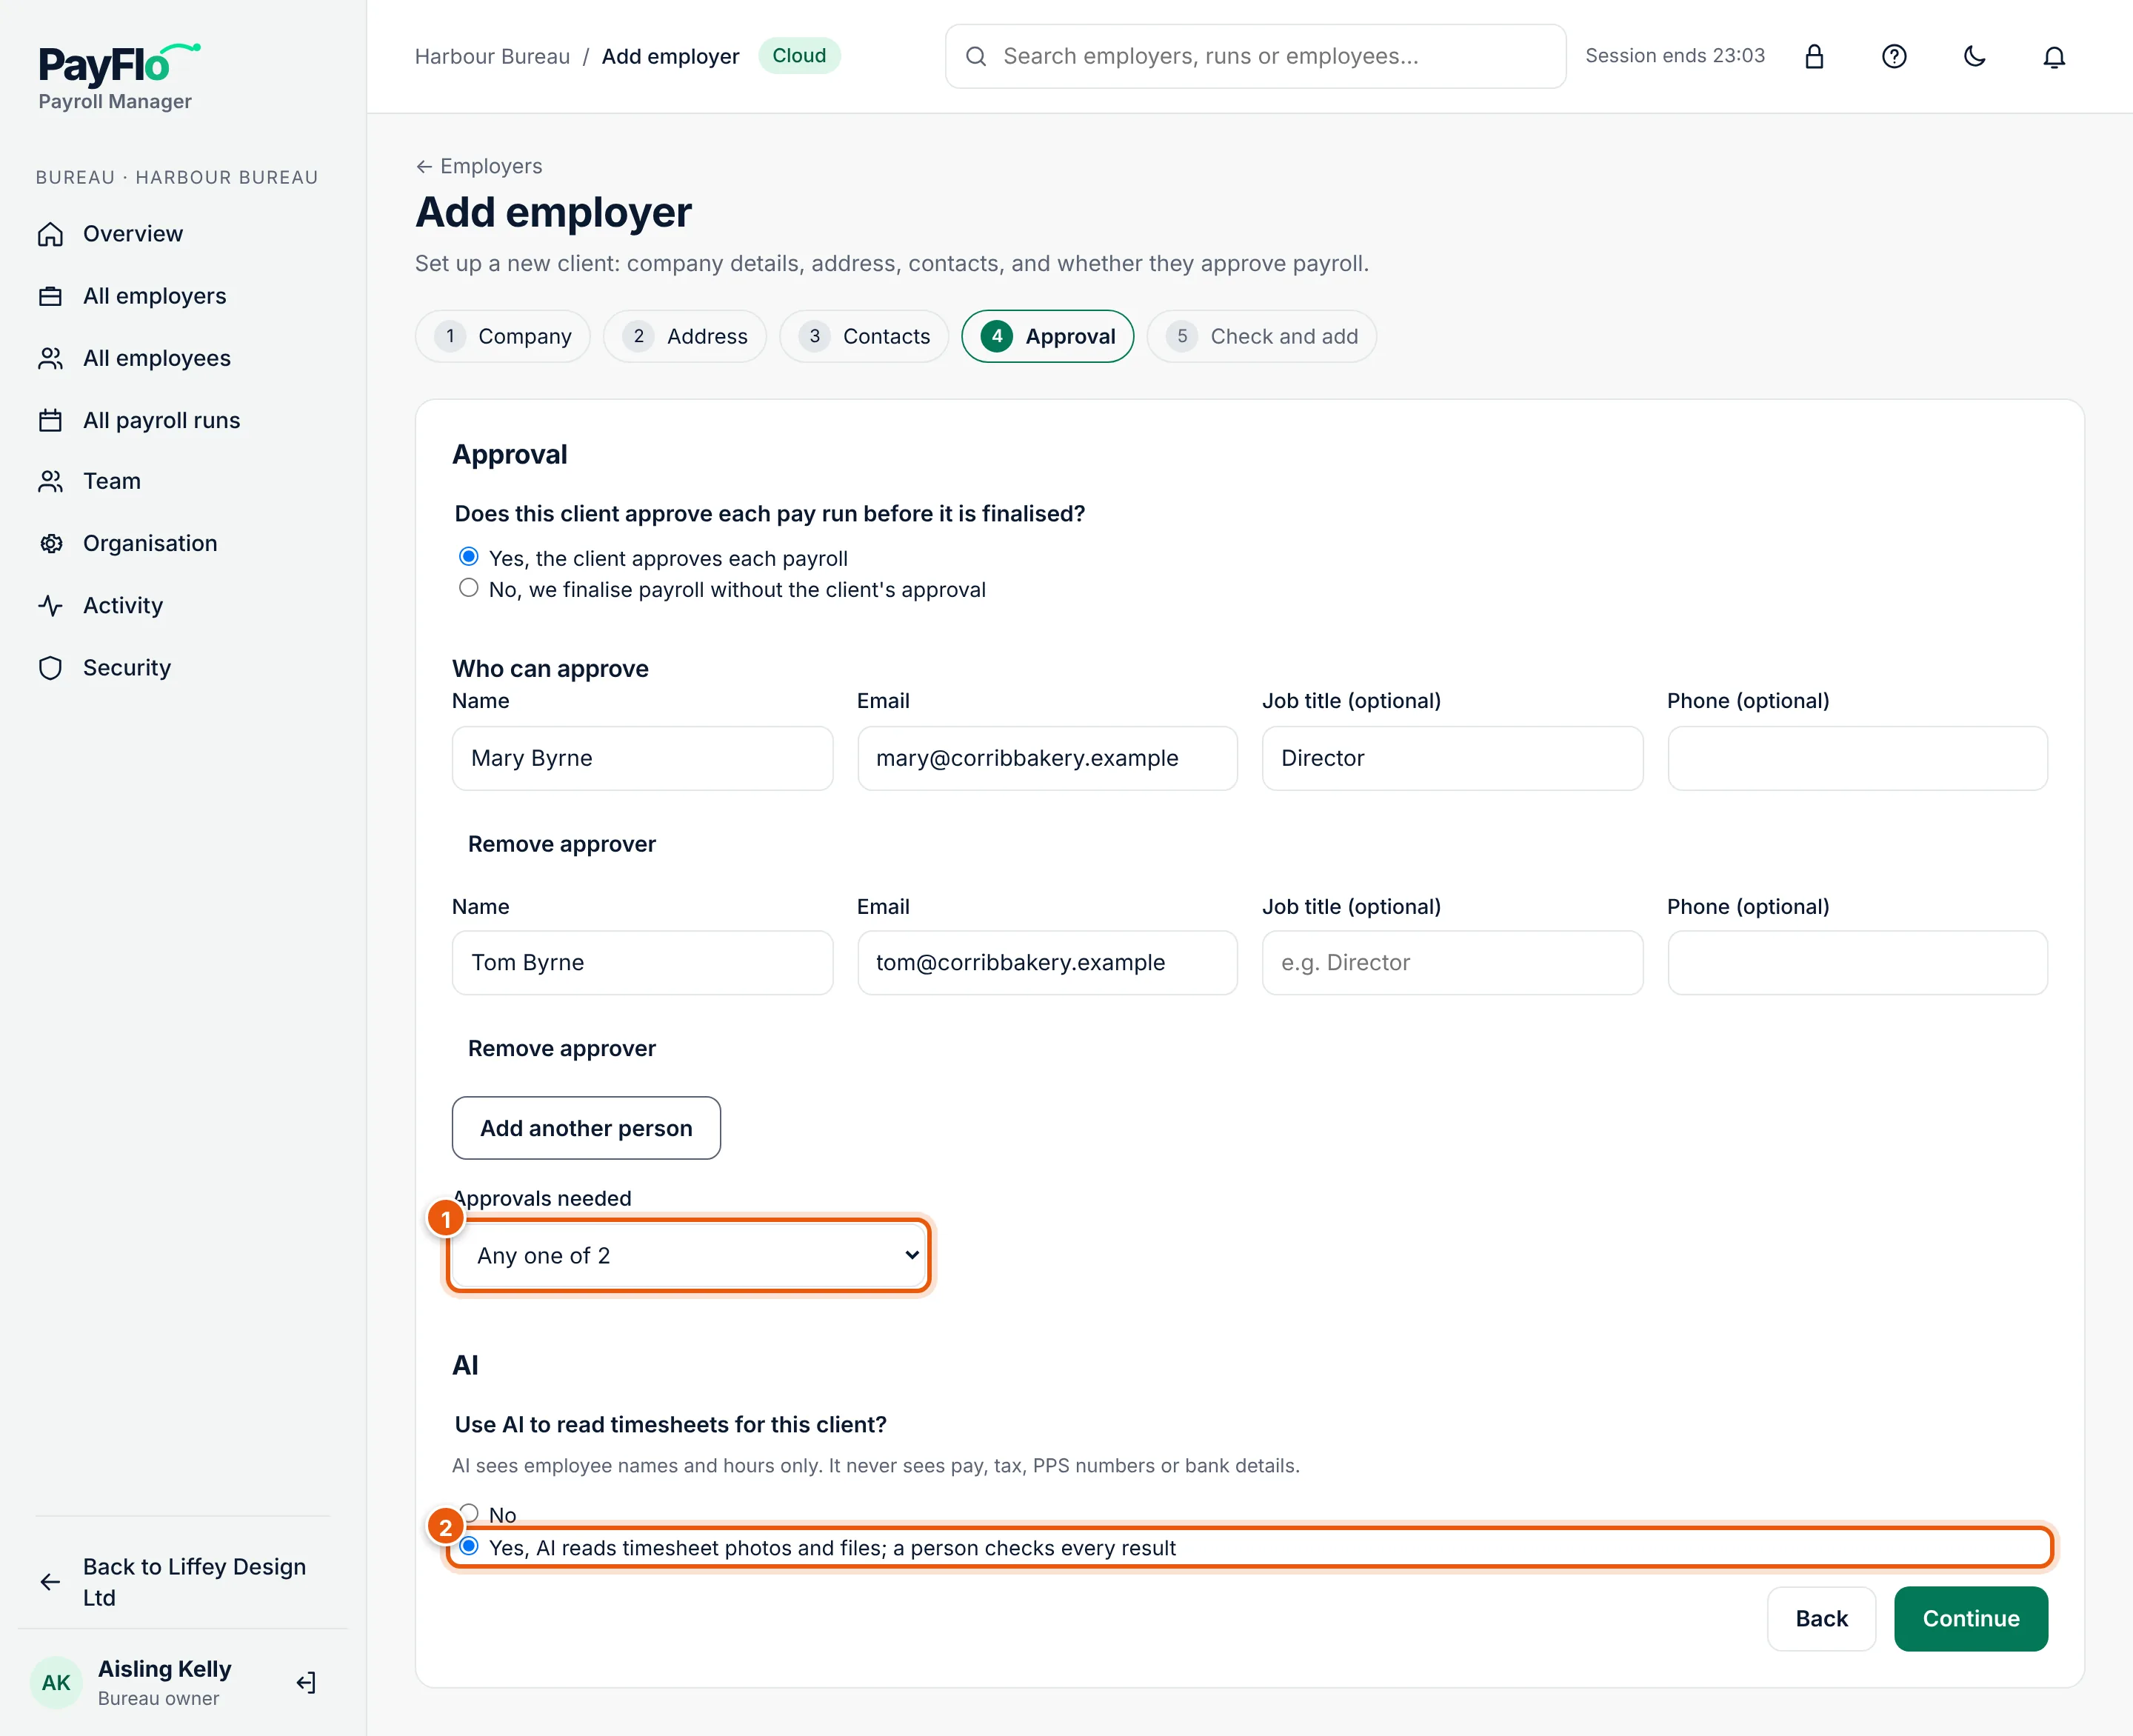
Use AI to read timesheets for this client? (2)
- No (the default): nobody uses AI for this client.
- Yes: AI reads photos of paper timesheets and spreadsheets of hours for this client, and a person checks every result before it is used.
Choose Continue.
Step 5: Check and add
Check the summary. To change something, choose Back. When everything is right, choose Add employer.
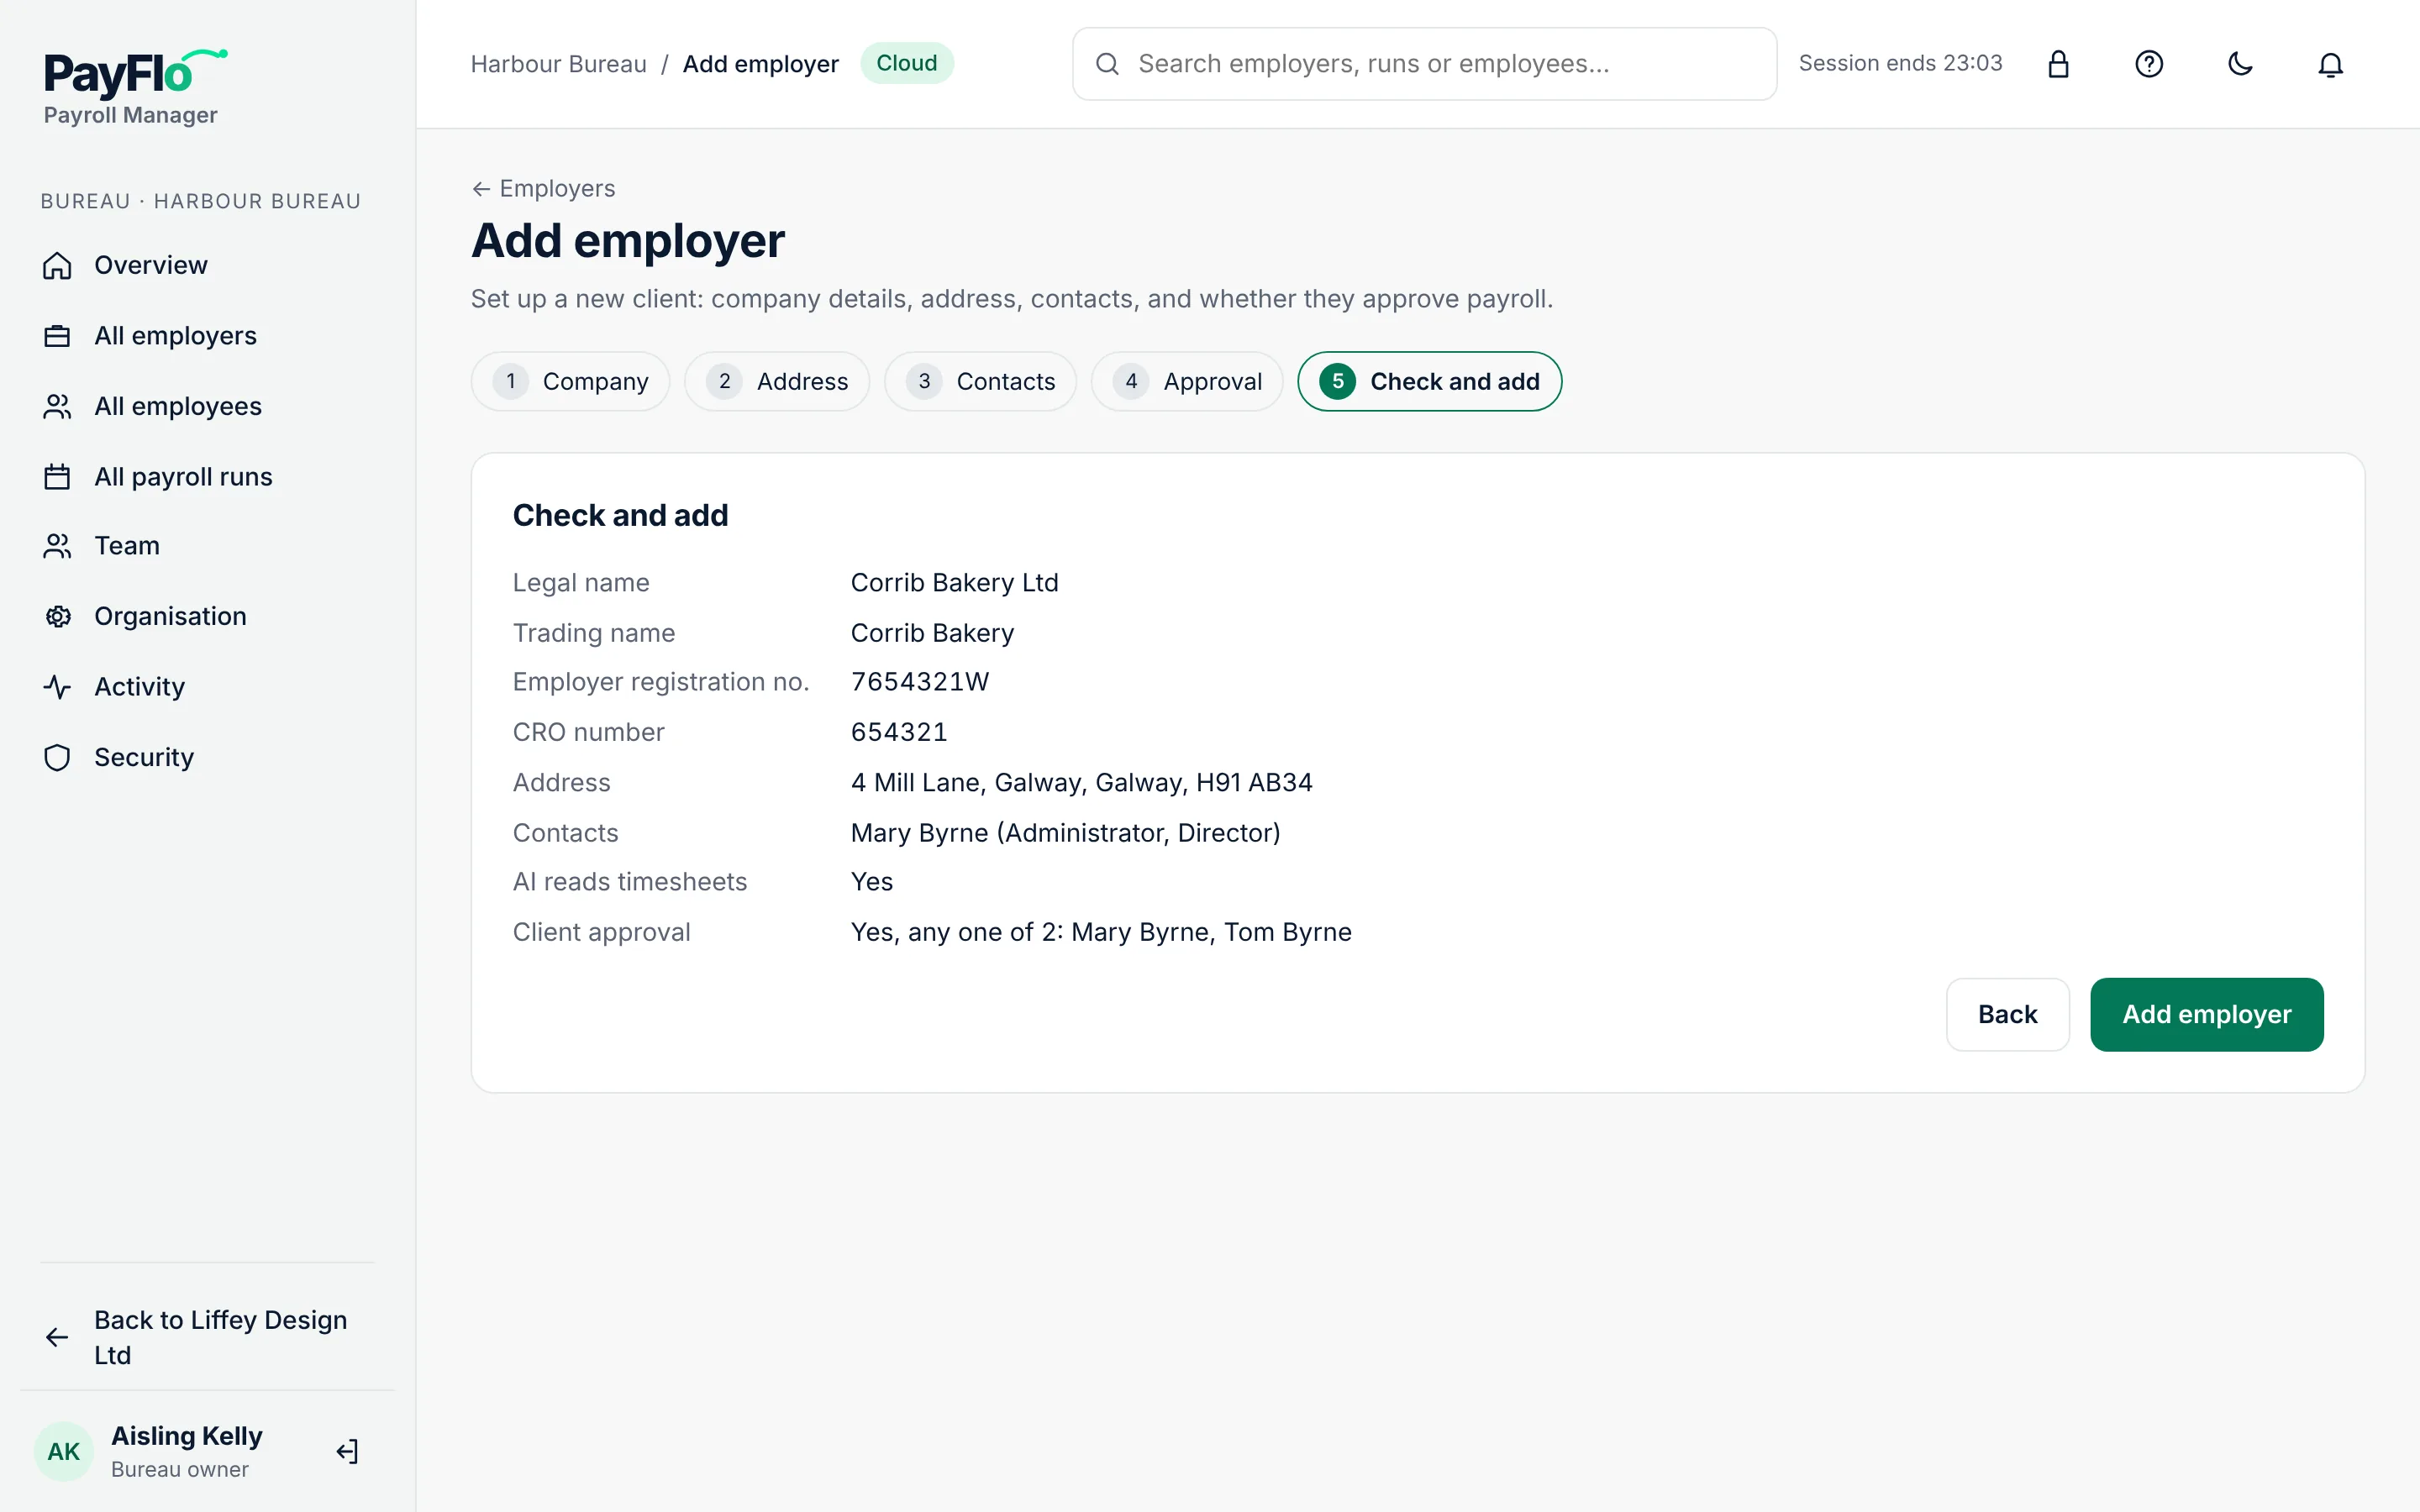
Cloud adds the client, switches the employer switcher to it and opens its Settings.
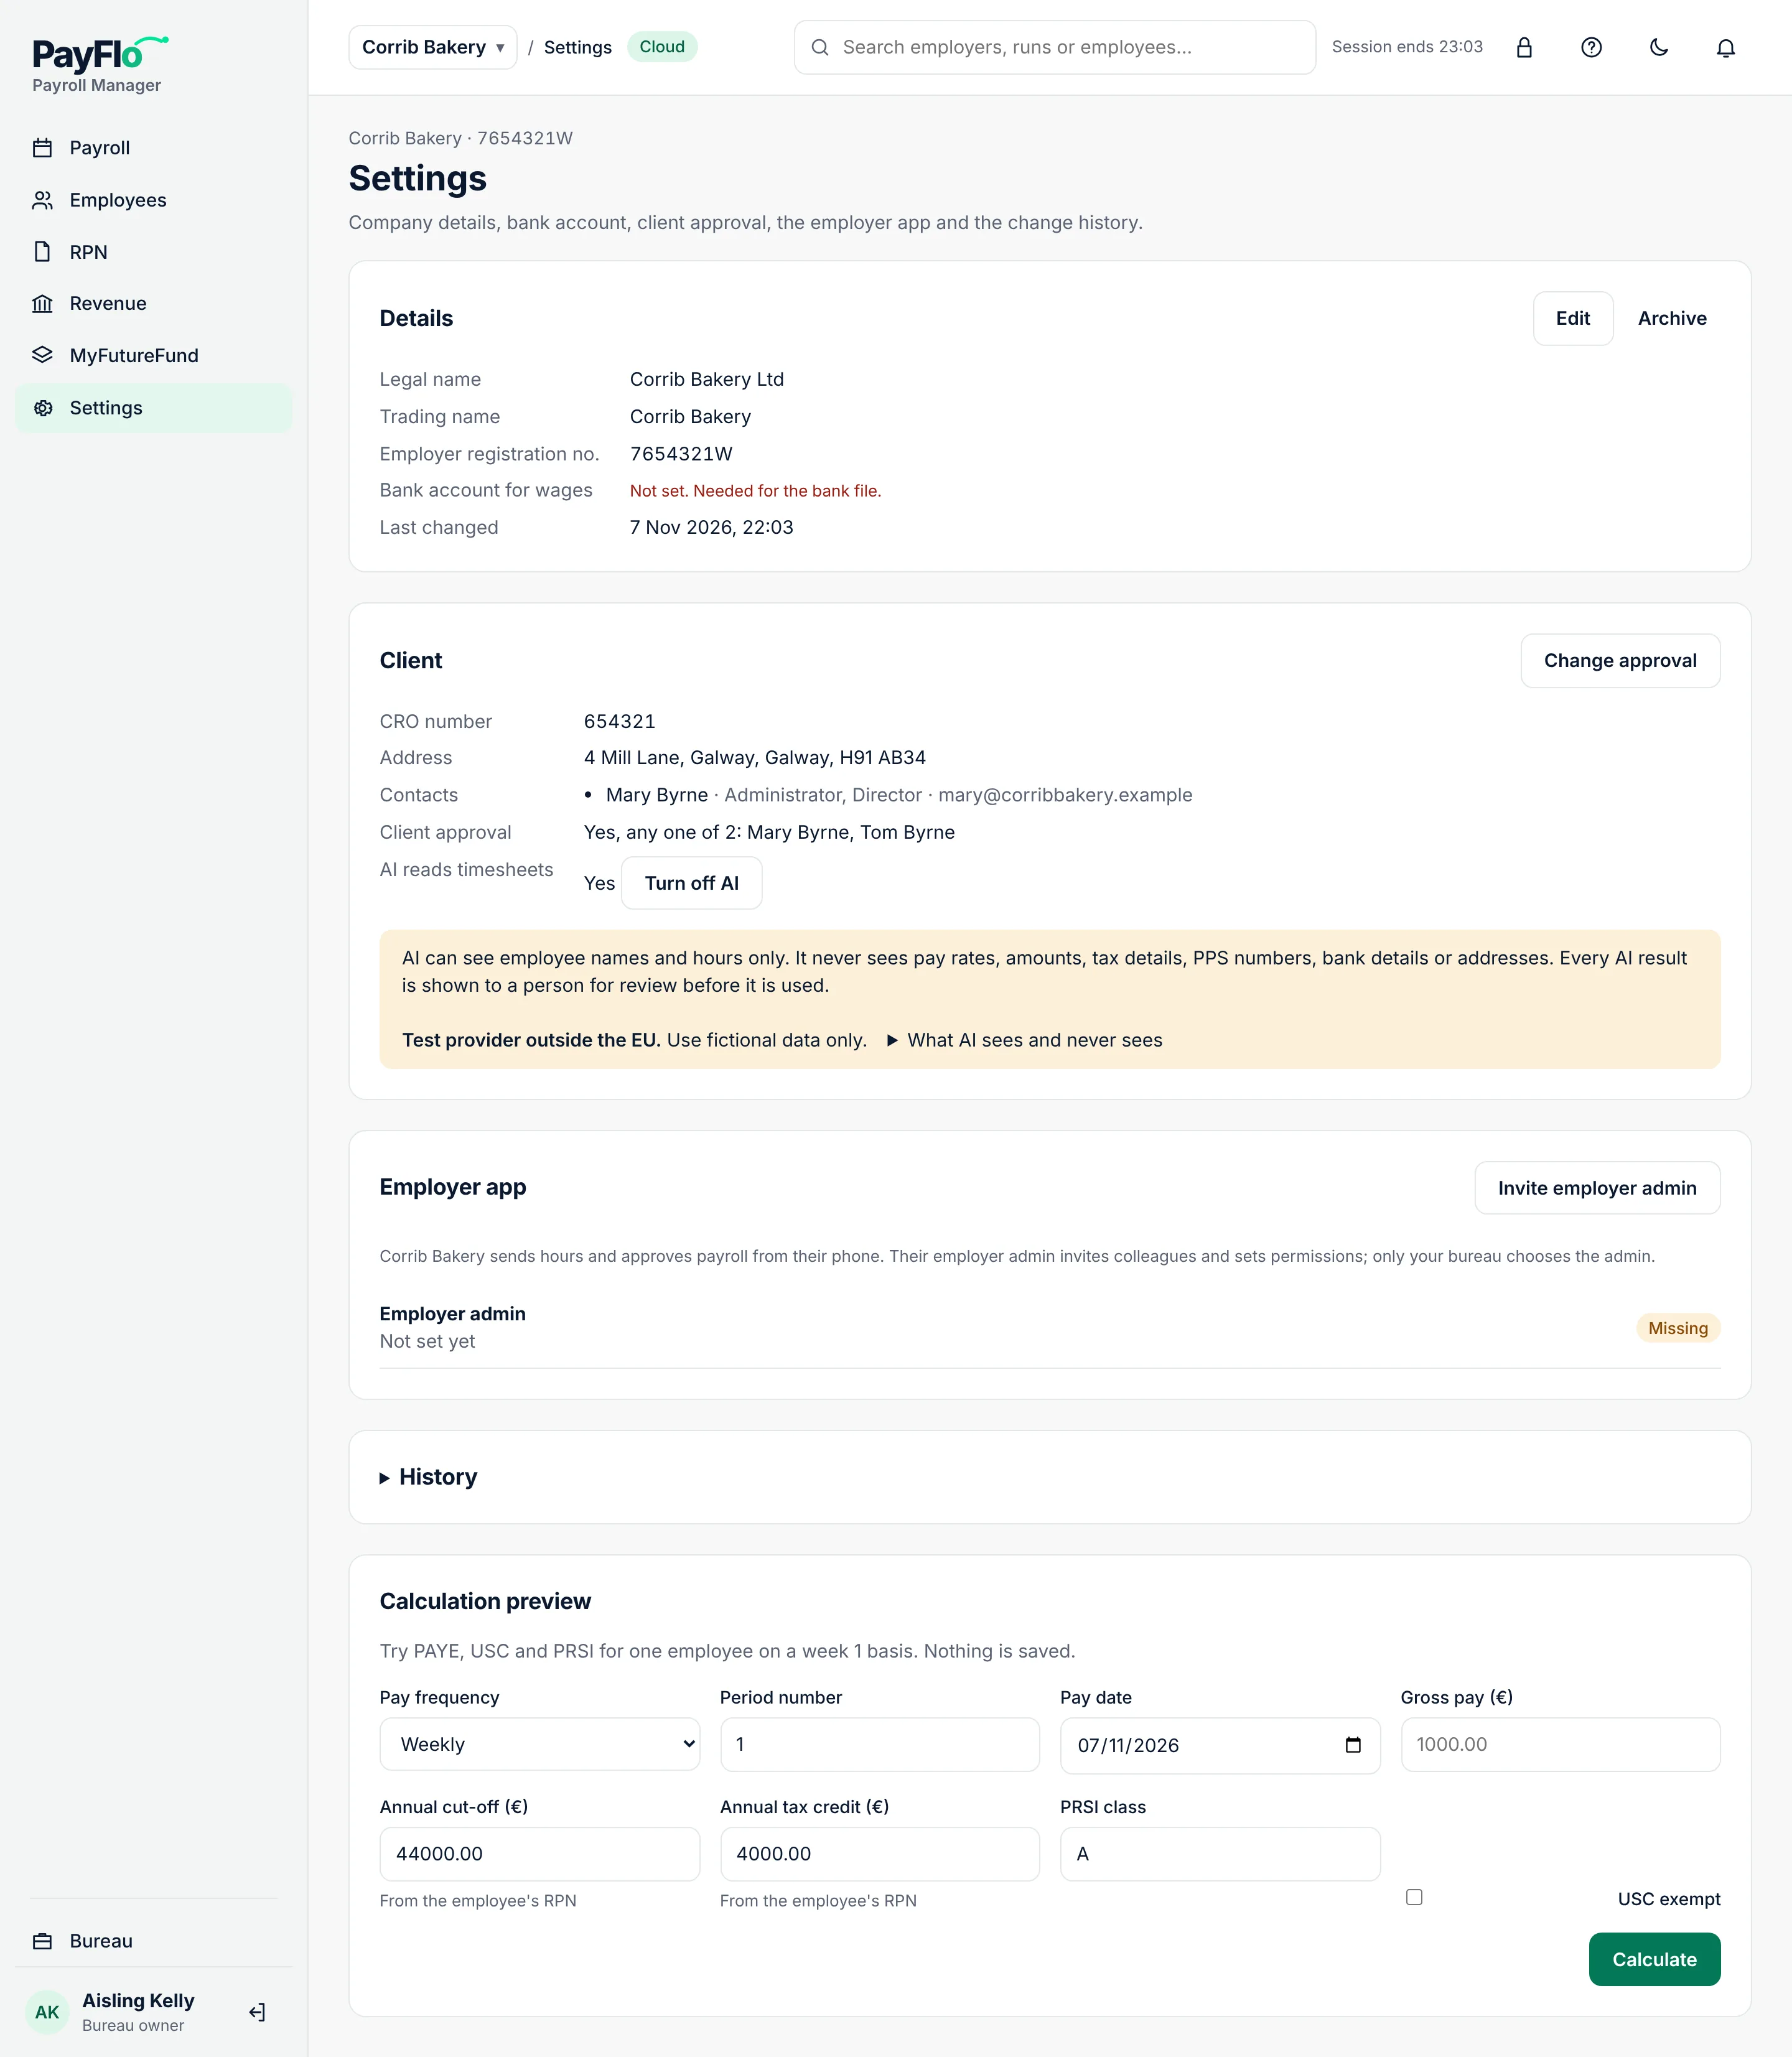
What to do next
- Add the bank account for wages in Client settings. The bank file needs it.
- Bring in the employees: RPNs from Revenue or Import employees from a CSV file.
- If the client will send hours from a phone, invite their employer admin.