

First start: the setup wizard
The first time Payroll Manager starts, it walks you through five short steps. Every choice can be changed later in Data & sync (backups, Central or Offline) and Updates & rules (licence, screen lock), so you do not need to get everything right now.
Step 1: Welcome and licence key
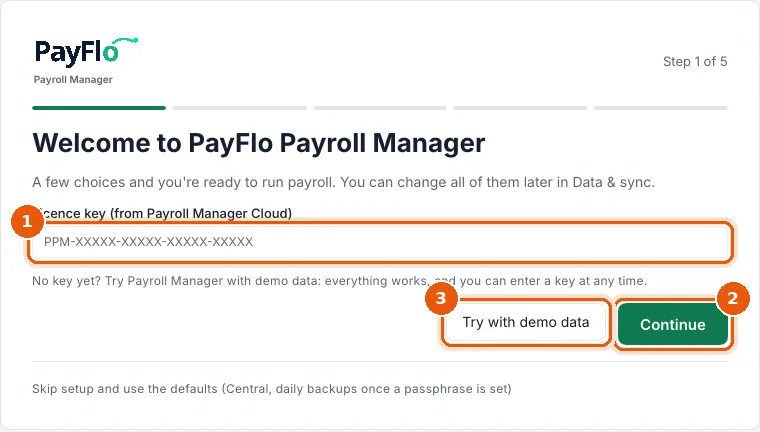
- Enter your Licence key (from Payroll Manager Cloud) (1). The licence key is shown in Payroll Manager Cloud; ask whoever manages your licence if you do not have it.
- Choose Continue (2).
No key yet? Choose Try with demo data (3). Everything works, and you can enter a key at any time on Updates & rules.
If you started a Portable copy or an AppImage, this step also offers Install PayFlo Payroll Manager on this computer. Tick it to get a menu entry and automatic updates.
Step 2: Where should your payroll data live?
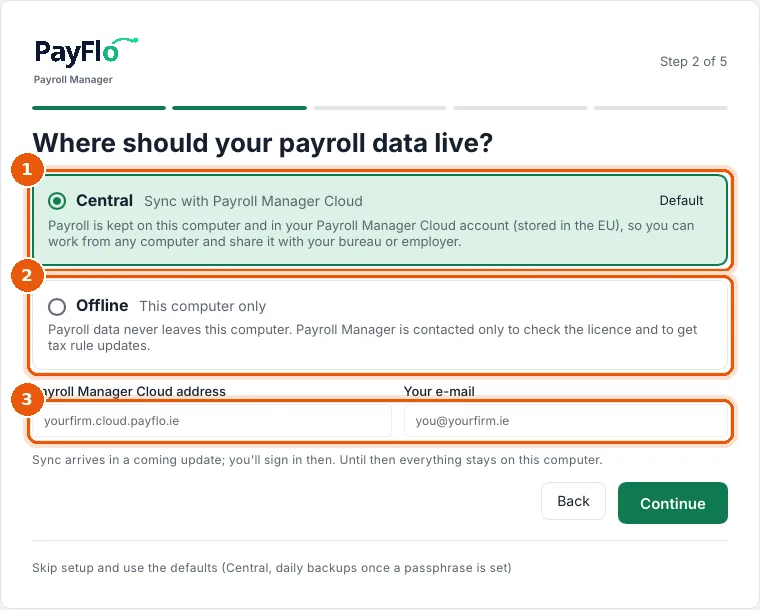
Choose one of two modes:
- Central (1), the default: payroll is kept on this computer and in your Payroll Manager Cloud account, stored in the EU. You can work from any computer and share the work with your bureau or the employer.
- Offline (2): payroll data never leaves this computer. Payroll Manager only contacts its servers to check the licence and to download tax rule updates.
For Central, enter the Payroll Manager Cloud address (for example yourfirm.cloud.payflo.ie) and Your e-mail (3).
Then choose Continue.
Step 3: Automatic backups
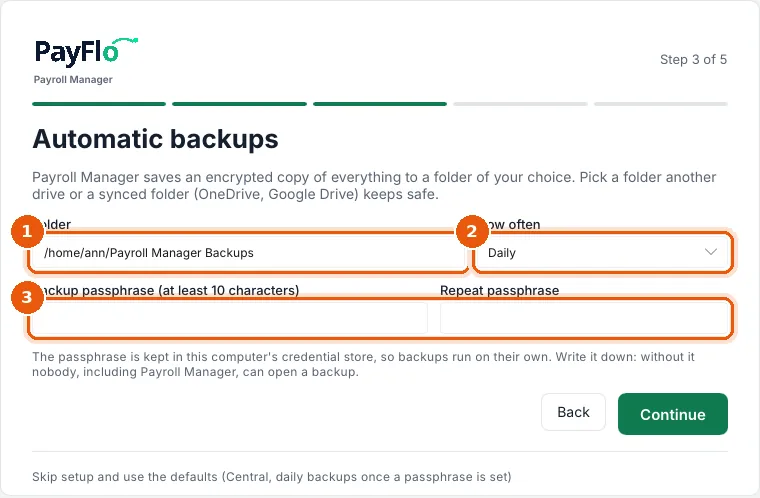
Payroll Manager saves an encrypted copy of everything to a folder you choose.
- In Folder (1), pick a folder that is kept safe somewhere else: another drive, a network share, or a synced folder such as OneDrive or Google Drive.
- In How often (2), choose Daily (recommended), Weekly or Off.
- Enter a Backup passphrase (at least 10 characters) and repeat it (3).
- Choose Continue.
Step 4: Protect pay data with a PIN
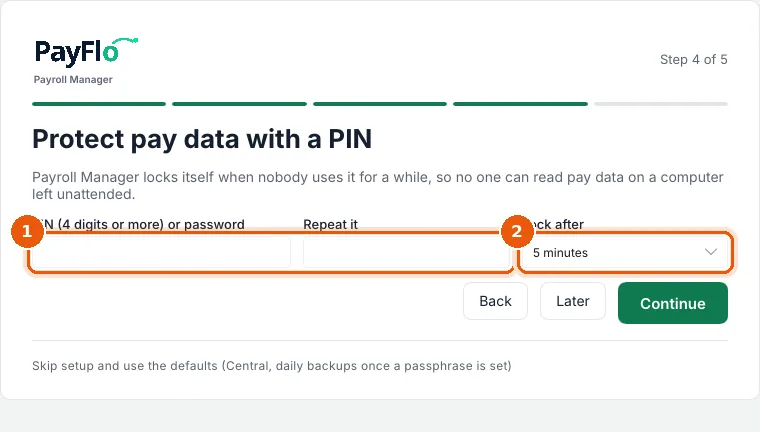
Payroll Manager locks itself when nobody uses it for a while, so no one can read pay data on a computer left unattended.
- Enter a PIN (4 digits or more) or password (8 characters or more) and repeat it (1).
- In Lock after (2), choose how long the computer can stay idle. 5 minutes is a good choice in an office.
- Choose Continue, or Later to set it on Updates & rules another time.
See Screen lock.
Step 5: How do you want to start?
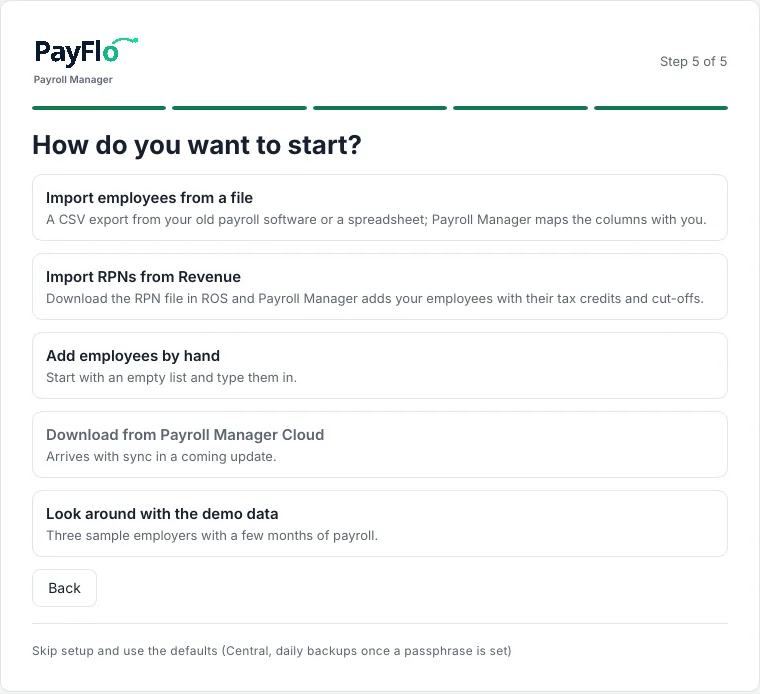
Choose how to get your employees in:
| Option | What happens |
|---|---|
| Import employees from a file | A CSV export from your old payroll software or a spreadsheet. See Import employees from CSV. |
| Import RPNs from Revenue | Download the employer's RPN file in ROS; Payroll Manager adds the employees with their tax credits and cut-off points. See Import RPNs. |
| Add employees by hand | Start with an empty list and type them in. See Add and edit employees. |
| Download from Payroll Manager Cloud | Arrives with sync in a coming update. |
| Look around with the demo data | Three sample employers (Liffey Design Ltd, Harbour Café Ltd and Atlantic Retail Group) with a few months of payroll. Good for training and for this help. |
Run the setup again
Go to Data & sync and choose Run setup again.