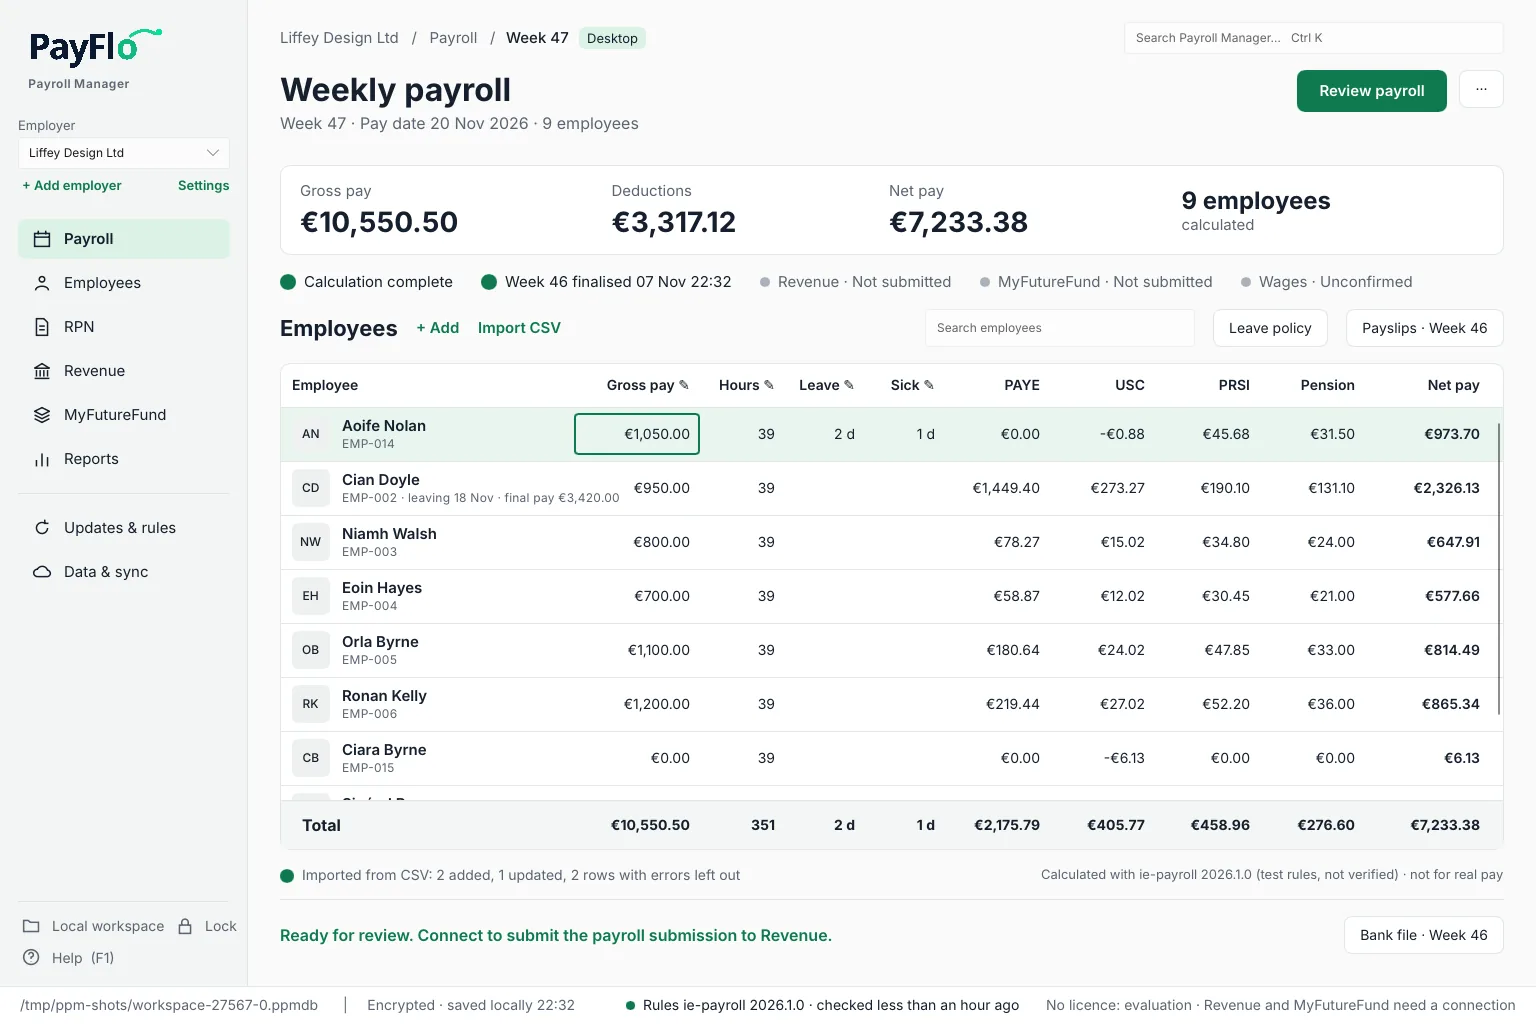

Import employees from CSV
Use a CSV import to bring employees over from your previous payroll software or a spreadsheet, or to update many employees at once, for example everybody's bank account. The import takes every employee field; only the fields Revenue needs are required.
Before you start
Export the employee list as a .csv file with the column names in the first row. Semicolons or commas both work, and so do amounts
like 950,00 or 950.00. Payroll Manager recognises common column names, for example:
| In your file | Becomes |
|---|---|
| Works No, Employee No, Staff ID | Payroll number |
| Forename and Surname, or Name | First name and Last name |
| PPS Number, PPSN | PPSN |
| Basic Pay, Gross | Gross pay (period) |
| Tax Basis, SRCOP, Tax Credits, PRSI Class | Tax instructions (until an RPN arrives) |
| Holiday Entitlement | Leave days a year |
| IBAN, BIC, Start date, Date of birth, Address, E-mail, Department | The same fields |
Import
- On the Payroll page, choose Import CSV next to Employees.
- Enter the path to the file and choose Read file (1). The line below says how the file was read (separator, encoding, number of rows).
- 1. Match the columns (2): Payroll Manager suggests a field for each column, with an example value from your file. Change any that are wrong. Choose Do not import for columns you do not need, such as Notes.
- 2. Check the rows (3): the summary says how many employees will be added, updated or are up to date, and how many rows have errors. Employees are matched by payroll number, else by PPSN: matched employees are updated, the others added. Rows with errors are shown in red with the reason, for example PPSN: the check letter does not match or Gross pay: this is not a number.
- Choose Import (4). Nothing is saved until you do.
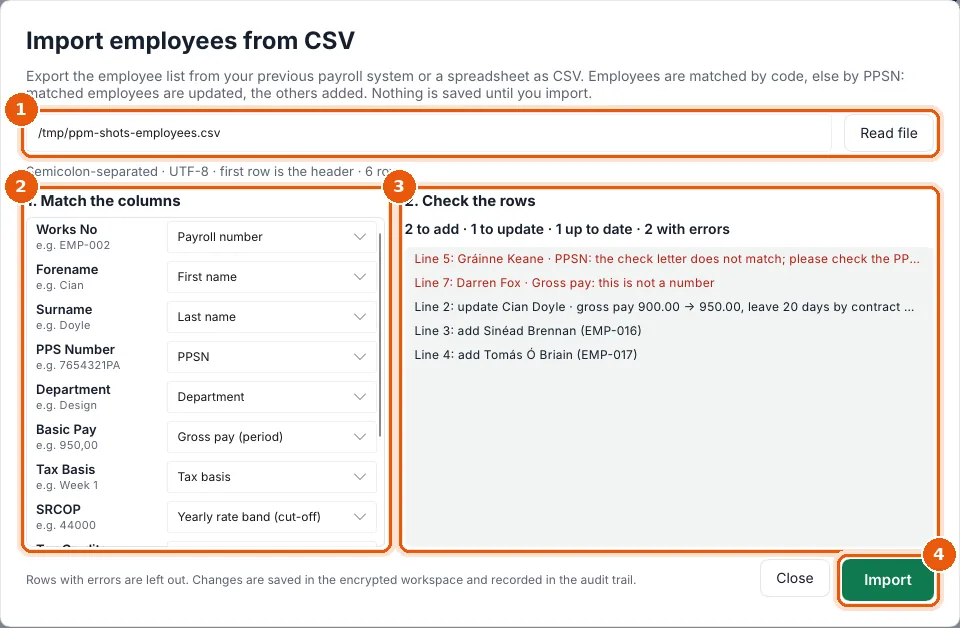
Rows with errors are left out. Fix them in the file and import it again (rows already imported come up as up to date), or edit the employee afterwards.