

Add an employer
Each employer you run payroll for has its own employees, RPNs, pay periods, leave policy and reports. A bureau adds every client here; a company adds itself once. It takes four steps and about two minutes.
Before you start
Have these to hand:
- The employer's legal name and address with Eircode.
- The PAYE registration number (ERN): 7 digits and 1 or 2 letters, e.g.
1234567T. It is on every Revenue letter and in ROS. - How often the employees are paid, and the first pay date you will run in Payroll Manager.
- Whether the employer wants to approve each pay run before you finalise it, and who approves.
Open the wizard
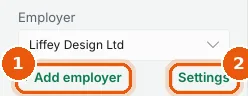
In the sidebar, under Employer, choose + Add employer (1). Settings (2) changes an employer you already have (see Employer settings).
Step 1: Company
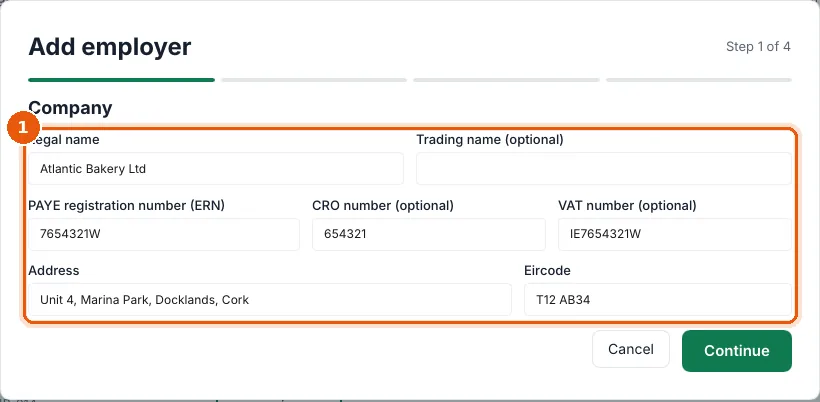
- Enter the Legal name, the PAYE registration number (ERN), the Address and the Eircode (1). Trading name, CRO number and VAT number are optional.
- Choose Continue.
If you see An employer with the number … is already here, the employer exists already: pick it in the employer switcher instead.
Step 2: Payroll
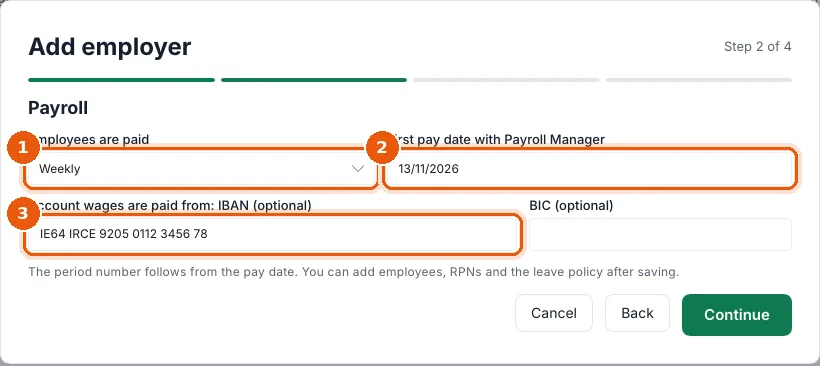
- In Employees are paid, choose Weekly, Fortnightly or Monthly (1).
- Enter the First pay date with Payroll Manager as dd/mm/yyyy (2). The period number (for example Week 46) follows from the pay date.
- Optional: enter the IBAN of the Account wages are paid from (3). It goes into the SEPA bank file. Leave BIC empty for an Irish IBAN: it is worked out.
- Choose Continue.
Step 3: Contacts and administrators
Add the people at the employer you deal with.
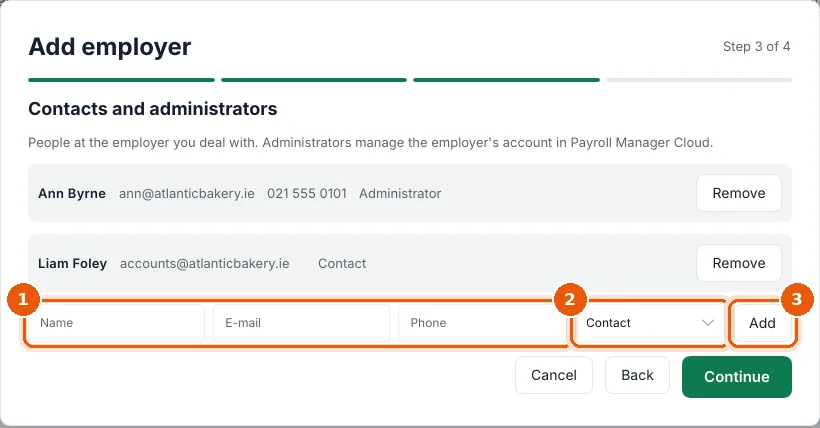
- Enter the Name, E-mail and Phone (1).
- Choose Contact or Administrator (2). Administrators manage the employer's account in Payroll Manager Cloud.
- Choose Add (3). Repeat for each person; Remove takes someone off the list.
- Choose Continue.
Step 4: Pay run approval
Payroll Manager asks Does … approve each pay run before it is finalised? (1). There is no default: if you choose Add employer without answering, you see Answer whether this client approves each pay run (2).
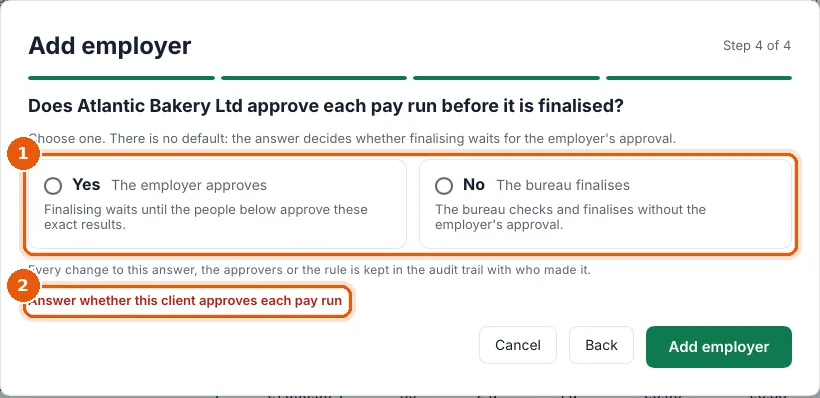
- No · The bureau finalises: you check and finalise without the employer's approval.
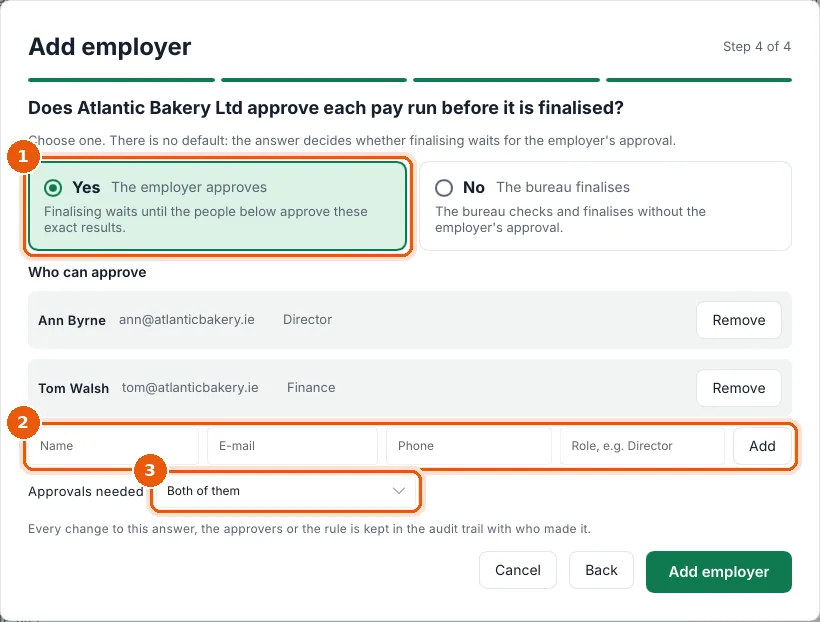
- Yes · The employer approves (1): finalising waits until the people you list approve exactly these results. Then:
- For each person who can approve, enter Name, E-mail, Phone and Role, e.g. Director, and choose Add (2).
- In Approvals needed (3), choose Any one of them, Both of them, or for example 2 of them when there are three or more approvers.
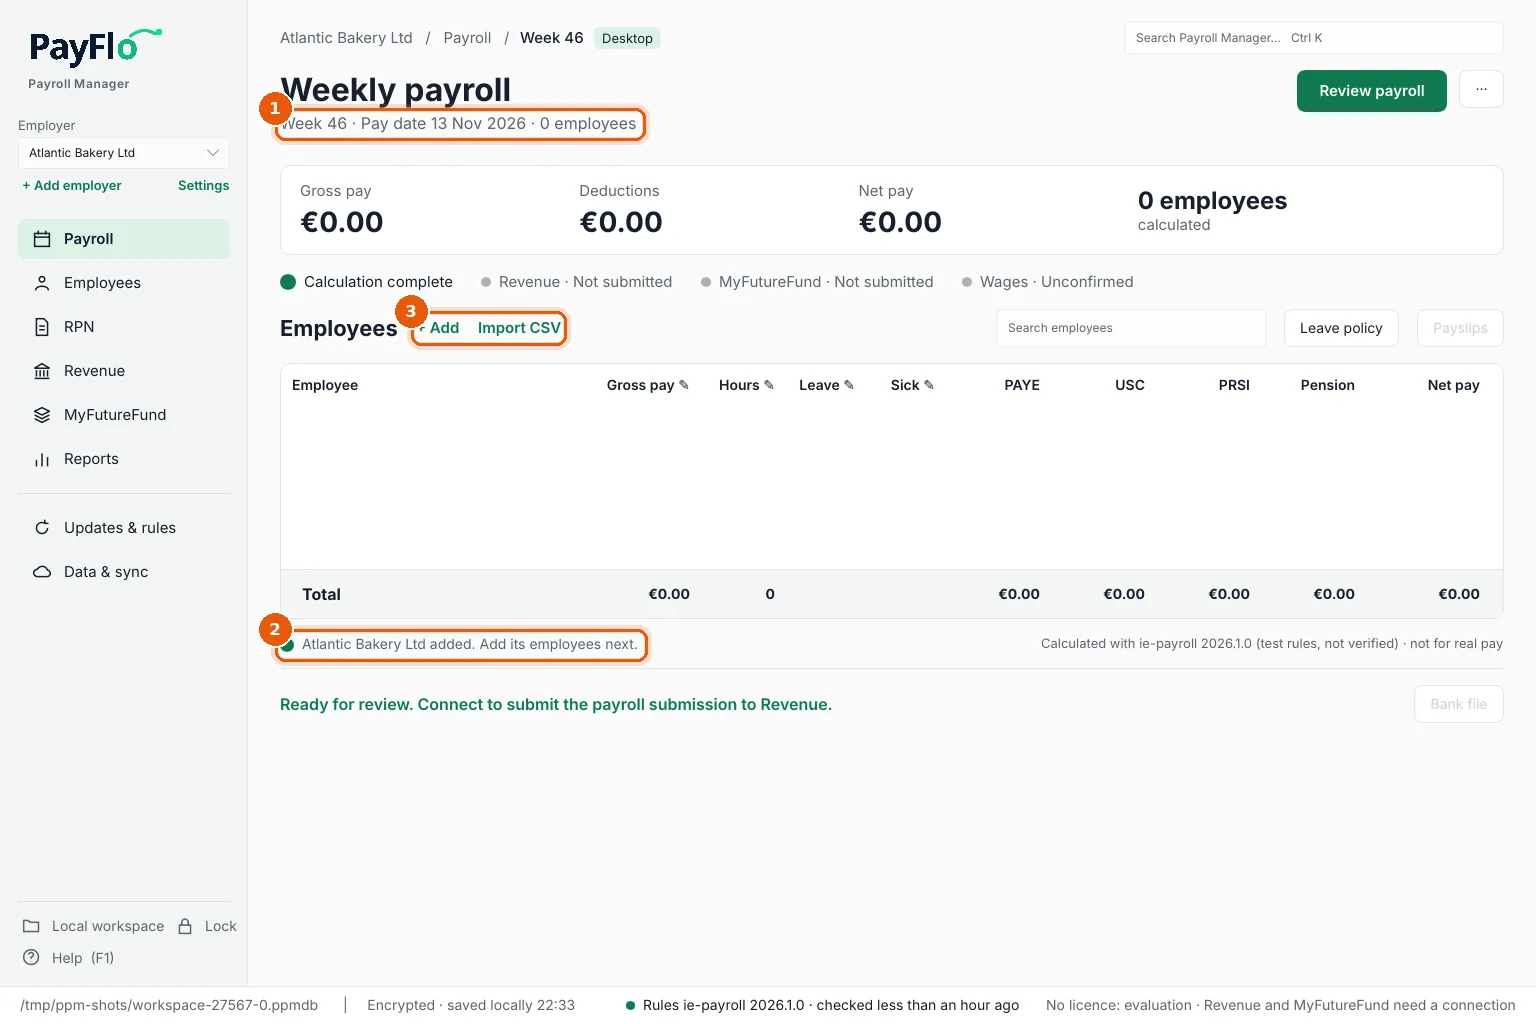
Choose Add employer. The new employer opens on the Payroll page, on the period of its first pay date (1). Add its employees next (2) with + Add or Import CSV (3), or import RPNs.
Every change to the approval answer, the approvers or the rule is kept in the audit trail with who made it.
Next steps
- Get the employees in: Import RPNs (best, because the tax credits come with them), Import employees from CSV, or add them by hand.
- Check the annual leave policy.
- Run the first payroll.