

Send hours from a file
If your hours are in a spreadsheet or a time and attendance system, you can upload the file instead of typing or photographing anything. The app works with almost any layout: you tell it once which columns hold the names and the hours, and it remembers that for your next file.
Before you start
- You have the Submit hours permission and the pay period is Open.
- The file is CSV or Excel (.xlsx), up to 2 MB and 5,000 rows, with a header row (column names on top).
- Each person is on one row (or one row per day, with a date column). People are named by employee number, full name, or first and last name in two columns.
Steps
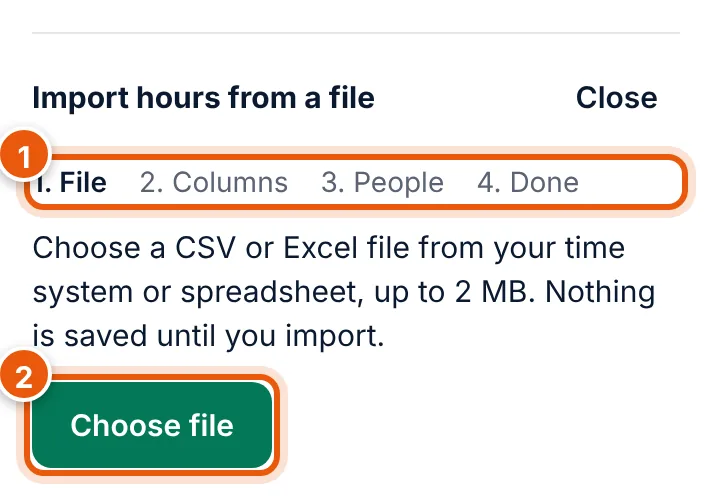
The import has four steps, shown at the top: 1. File, 2. Columns, 3. People, 4. Done.
1. Choose the file
- On Hours, in the open pay period, choose Upload Excel or CSV.
- Choose Choose file (2) and pick the file. Nothing is saved until you import.
2. Check the columns
The app shows how it read the file: the file name, the number of rows and the header row.
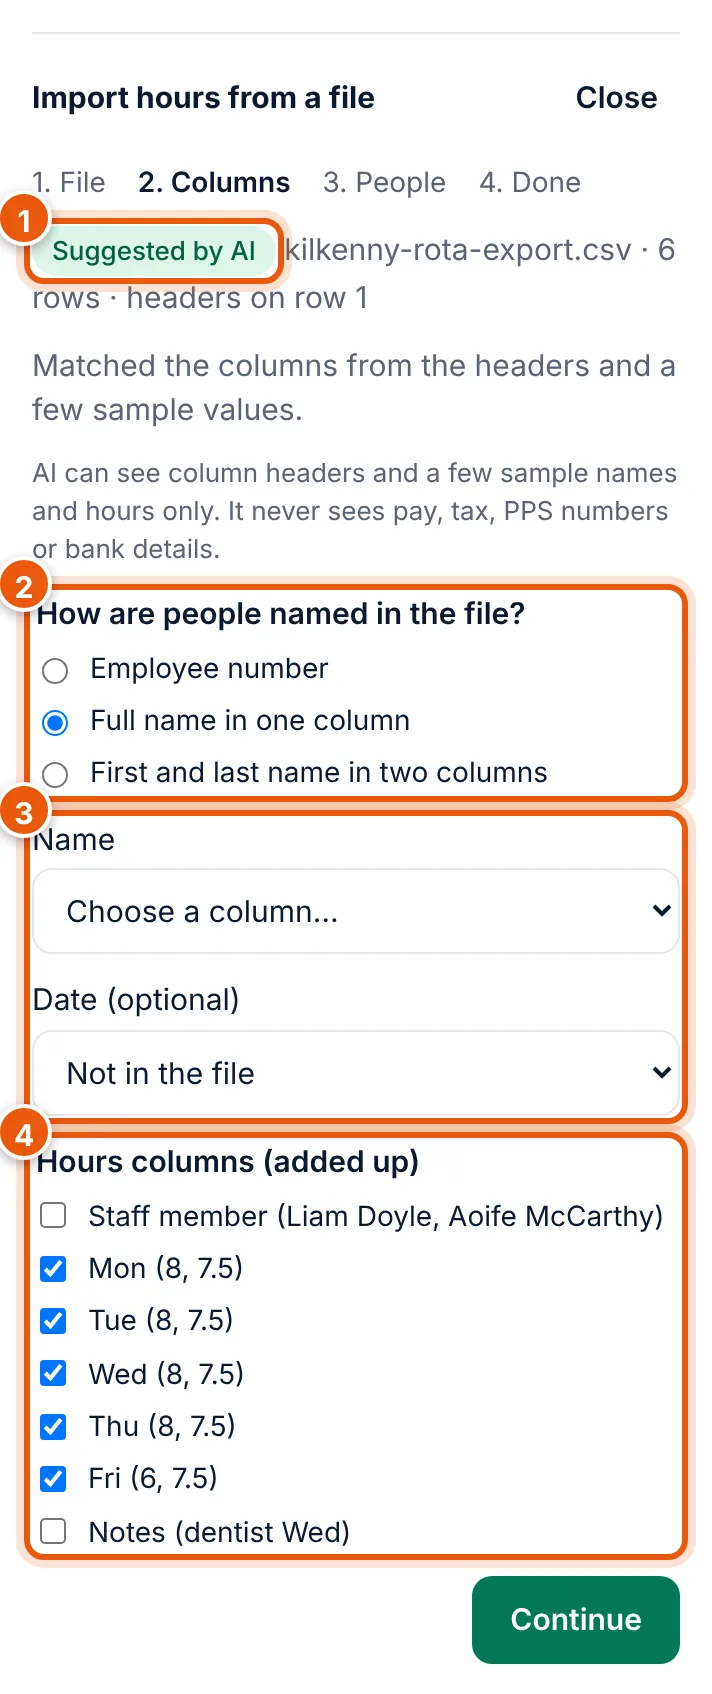
- Where the column choice came from: Suggested by AI, Saved layout for this client (used last time) or Guessed from the headers.
- How are people named in the file? Choose Employee number, Full name in one column or First and last name in two columns.
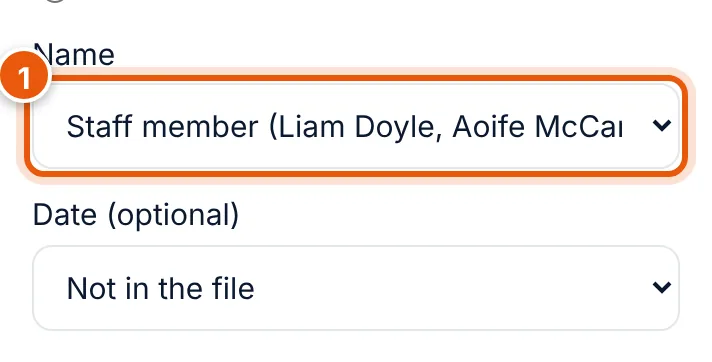
- Choose the column for the name (or number). Date (optional) is only needed if the file has one row per day.
- Hours columns (added up): tick every column with hours. The app adds them up, so tick Monday to Friday, but not a Total column as well, or the hours are counted twice. Each column shows two sample values in brackets to help you.
If a field says Choose a column…, pick the right column from the list:
Then choose Continue.
3. Check the people
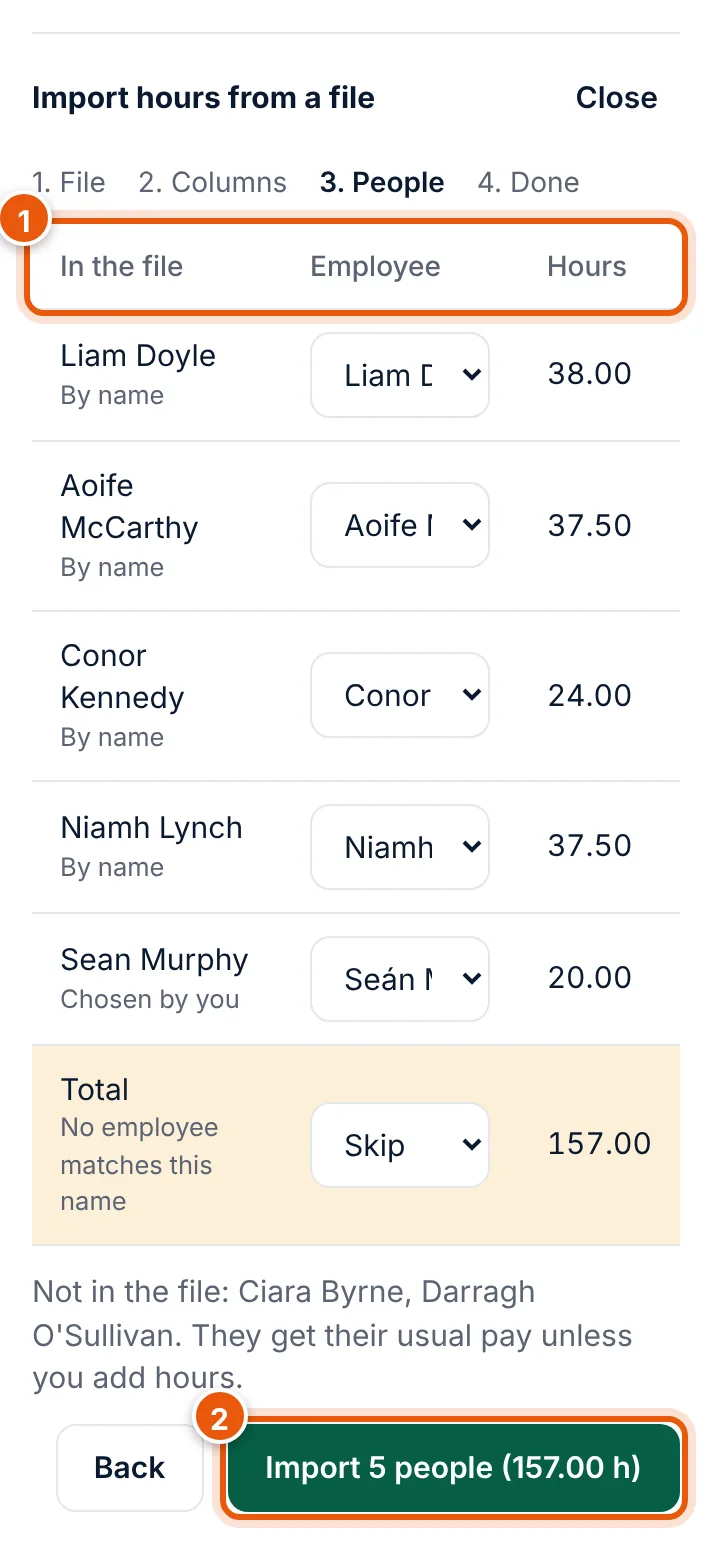
Each row shows the name In the file, the Employee it matched, and the total Hours. Under the name you see how it was matched: By employee number, By name, From an earlier import or timesheet or Chosen by you.
- If a row has no match (for example a Total line, or a spelling the app does not know), choose the right person in Employee, or leave it on Skip.
- Your choice is remembered for the next file.
- Not in the file lists staff on this payroll who are not in the file. They get their usual pay unless you add hours.
- lines left out (if shown) lists lines the app ignored, with the reason.
Choose Import N people (H h) (2). The button shows how many people and how many hours you are about to send.
4. Done
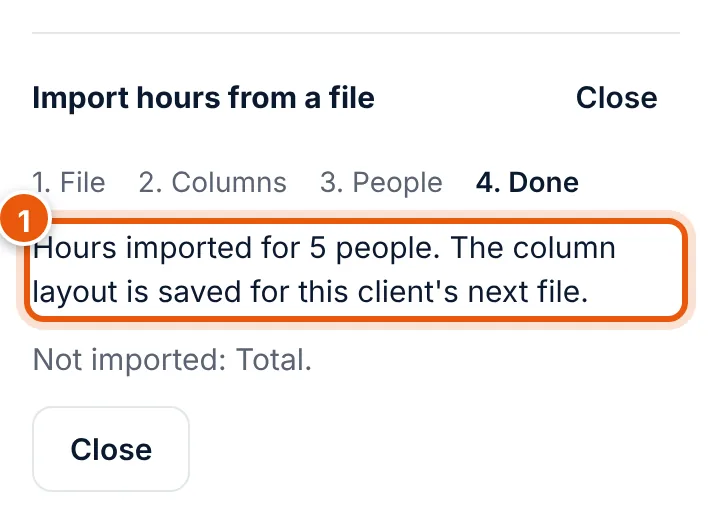
The app says Hours imported for 5 people. The hours are now in the pay period at your bureau. If this was the first file in this layout, it adds The column layout is saved for this client's next file. Not imported lists rows you skipped.
Choose Close.
Next time
With the same file layout, step 2 says Saved layout for this client, and step 3 says Using the saved layout for this client. Usually you only check the people and choose Import. If your layout changed, choose Change columns.
If the file is refused
| You see | What to do |
|---|---|
| The file is too large (over 2 MB). | Export only this pay period, or remove extra sheets and columns. |
| We couldn't read this file. Use CSV or Excel (.xlsx) with a header row. | Save as CSV or .xlsx (not .xls, .numbers or PDF) and make sure the first row has column names. |
| The file has more than 5,000 rows. | Export only this pay period. |
| This pay period is closed. | Ask your bureau. |